In short :
- There’s no single best compost bin — only the one that fits your waste, your space and your winters.
- Start by measuring your weekly scraps for two weeks, then let that number pick the family for you.
- Worm bins and small sealed units suit light kitchen-only households, tumblers work in tight spaces, and stationary or wooden bays handle real volume.
- Get size and siting right: three to six months of capacity, level well-drained ground, partial shade, easy access in bad weather.
- Treat it as a habit, not a purchase — five minutes a week beats any feature list.
You know the moment. You’re standing at the counter with a bowl of coffee grounds, banana peels and a bunch of parsley that gave up days ago, and you’d rather not scrape it into a plastic bag destined for landfill. So you start looking at compost bins — and suddenly there are a dozen shapes, systems and sizes, all promising black gold by autumn.
Here’s the honest starting point: there is no single best compost bin. There’s only the bin that matches how much waste you produce, how much room you have, how often you’re willing to touch the contents, and what your winters look like. Get that match right and composting becomes almost invisible — a routine you barely notice. Get it wrong and you end up with a sour, heavy container you quietly stop opening.
This guide works through the decision in the order that actually matters. First the material going in. Then the bin families, side by side. Then the two choices people regret most — size and location. Then the details that separate a bin that lasts a decade from one that cracks in its second winter.
Table of contents
- What you’re feeding it matters more than the bin itself
- The main bin families, and how each one behaves
- Size and siting: the two decisions people regret
- Materials and build quality: what survives ten winters
- Aeration, moisture and turning: how the design shapes your routine
- Climate, wildlife and neighbours
- Keeping it running: routine, troubleshooting and harvest
- Frequently asked questions
What you’re feeding it matters more than the bin itself
A compost bin is just a container. The decomposition happening inside follows the same rules whether you’ve spent a fortune or built something from scrap pallets. Two variables drive everything: volume, and the balance of what you add.
Think in two categories. Greens are wet, nitrogen-rich and decompose fast — vegetable peelings, fruit scraps, coffee grounds, tea leaves, fresh grass clippings, spent plants. Browns are dry, carbon-rich and structural — fallen leaves, torn cardboard, shredded paper, straw, wood chips, sawdust. A healthy pile wants roughly two to three parts browns by volume for every part greens. Too many greens and you get the classic wet, ammonia-smelling sludge. Too many browns and nothing much happens for months.
Now measure your reality. A household of four typically generates one to two litres of kitchen scraps a day — a small bowl or bucket. That sounds modest until summer arrives. A single mowing of a small lawn can dump more clippings in twenty minutes than the kitchen produces in three weeks, and those clippings are wet, dense and nitrogen-heavy. If your plan is a tidy little countertop bin, that lawn will overwhelm it in June.
So do a quick two-week test. Collect kitchen scraps in a lidded container and note how full it gets. Estimate your yard waste separately, season by season. Under about five litres a week with no garden waste, you’re a candidate for a small enclosed unit or a worm bin. Over twenty litres a week plus yard waste, you need genuine volume — around one cubic metre, roughly a metre on each side, is the practical minimum for a pile that heats up reliably. Anything smaller will still compost, just slowly and coolly, which is perfectly fine if you’re patient and not in a hurry.
One more input decision before you shop. Meat, fish, dairy, cooked leftovers and pet waste are the ingredients that turn a compost bin into a wildlife magnet. If you want to compost them, you need a fully sealed system — a closed digester sunk into the ground, or an indoor fermentation method that pickles the scraps before they ever meet your soil. For an open or vented outdoor bin, keep them out.
The main bin families, and how each one behaves
Almost every backyard system on the market or in a garden centre falls into one of six families. Each has a personality — a set of trade-offs you’ll live with every week.
| Bin family | Best for | Turning effort | Pest resistance | Watch out for |
|---|---|---|---|---|
| Open heap or slatted wooden bay | Large gardens, lots of yard waste, low budgets | High — needs a fork every few weeks | Low unless fully enclosed | Looks untidy; rodents if food scraps are added |
| Stationary single-chamber bin | Average households with mixed kitchen and garden waste | Moderate — turn every two to four weeks | Moderate with a base and lid | Heavy when full; hard to reach the bottom layer |
| Tumbler (single or dual chamber) | Small gardens, fast batches, people who dislike forks | Low — a few spins every few days | Good when elevated and sealed | Limited capacity; contents can turn soggy and clump |
| Continuous-flow or multi-chamber unit | Steady supply, harvesting without stopping the process | Low to moderate | Good | Higher upfront outlay; needs a consistent feed rate |
| Worm bin (vermicomposting) | Flats, balconies, kitchen scraps only, no yard waste | None — worms do the work | Excellent indoors | Worms die in heat or frost; no grass clippings or citrus in bulk |
| In-ground digester | Small gardens, food scraps including cooked food | None | Very good | Slow; produces soil enrichment rather than usable compost |
Picture two neighbours. One has a courtyard of twelve square metres and a kitchen that produces a litre of scraps a day. A tumbler parked beside the shed suits that life perfectly: sealed, out of the way, and turned in thirty seconds while walking past. The other has a long garden, a hedge to trim and three mature trees dropping leaves every October. A pair of slatted wooden bays works better there — one filling, one maturing — because volume, not convenience, is the limiting factor.
The lesson is blunt. Match the family to your waste stream, not to how the bin looks in a photograph.
Size and siting: the two decisions people regret
People rarely regret the bin they bought. They regret where they put it and how small it was. Both are fixable on paper and painful in practice.
On size, work backwards from your weekly input. A useful rule of thumb: the bin should hold roughly three to six months of material at the volume you generate. Under that, you’re constantly adding fresh scraps to nearly finished compost, which slows everything down. Over that, you’re hauling material you can’t aerate properly. If you produce about thirty litres a week, a three-hundred-litre bin is a sensible middle ground.
Siting deserves more thought than it usually gets. Aim for level, well-drained ground — a bin on a slope will collect rainwater running downhill and turn into a swamp. Partial shade is ideal: full sun bakes a plastic bin and dries the contents, while deep shade keeps everything cold and soggy. You want it close enough to the kitchen door that carrying scraps out in January isn’t a chore, but far enough from bedroom windows that nobody debates the smell.
Keep at least half a metre of clearance from wooden fences and shed walls. Damp, warm, undisturbed gaps between a bin and a wooden panel are exactly where rodents like to travel. A bin pushed hard against a fence also loses airflow on one side and makes turning awkward.
Then think about winter access. A bin at the bottom of a garden, behind a gate that swells in the rain, will be ignored from November to March. A concrete example: a household that placed its bin at the far corner of a sloped lawn found that snow melt ran underneath it, the base rotted, and the contents froze into a solid block they couldn’t turn. Moving the same bin to a flat spot near the path, on a paved pad, changed everything.
Materials and build quality: what survives ten winters
Compost is an aggressive environment. It’s warm, wet, acidic at times, and you’ll be stabbing it with a fork. Whatever the bin is made from has to tolerate all three.
Thick, UV-stabilised plastic is the most common choice and generally the most forgiving. Look at wall thickness and how the panels join — thin, snap-together walls flex in summer heat and turn brittle after a hard freeze. Untreated wooden bins breathe beautifully and insulate well, but untreated softwood in permanent ground contact typically gives you a handful of years before the bottom boards soften. Metal conducts heat and cold straight into the contents, which is fine in mild climates and unhelpful in cold ones.
Details matter more than the headline material. A well-fitting lid keeps rain out and holds warmth in — a loose one does neither. A base panel or a sturdy mesh floor stops rodents tunnelling up from below and stops the bottom layer turning anaerobic. Locking tabs or a simple latch keep the lid on during storms and stop animals nosing it open.
If you’re building rather than buying, slatted sides with small gaps give you airflow without letting material spill, and a removable front panel makes harvesting far easier than digging from the top. Space the slats about a finger-width apart. Any wider and the pile dries out along the edges; any tighter and you lose ventilation.
One realistic example: a gardener used thin-walled panels held together with plastic clips. Two summers of UV and one cold snap later, the clips had cracked and the walls bowed outward under the weight of the contents. The same volume in a bin with reinforced corners and a rigid base frame held its shape through a decade of freeze-thaw cycles. The difference wasn’t the material — it was the structure.
Aeration, moisture and turning: how the design shapes your routine
The microbes doing the work need oxygen and moisture, and the bin you choose decides how you supply both.
Tumblers make turning effortless — a few rotations every two or three days is plenty. But rotation also compacts wet contents into dense balls, which is why tumbler owners so often end up with a heavy, sludgy mass. The fix is straightforward: add a handful of dry browns every time you add scraps, and don’t spin the drum more than once a day. Over-turning cools the pile and slows it down.
Stationary bins reward a different rhythm. Turning every two to four weeks with a fork, pulling the outside material into the middle, is usually enough. If you’d rather not turn at all, stand a perforated aeration pipe upright in the centre of the pile and add a coarse layer of twigs or wood chips at the base. That single base layer is one of the most underrated upgrades you can make.
Worm bins and in-ground digesters are the exception: never turn them. Disturbing a worm bin sends the population into retreat and slows processing for weeks.
For moisture, use the squeeze test. Pick up a handful of material and squeeze. It should feel like a wrung-out sponge — damp, not dripping. Dripping means too wet: add browns and turn. Crumbling and dusty means too dry: add water and turn. And if the bin smells sour or like ammonia, that’s a reliable signal of too much nitrogen and not enough air. Add a generous layer of shredded cardboard, turn it through, and give it a week.
Climate, wildlife and neighbours
Where you live changes which bin makes sense, more than most guides admit.
In cold-winter climates, mass is your friend. A larger volume holds heat better than a small one, which is why a single big bay often outperforms two small ones. Insulating the sides with straw bales, siting the bin against a south-facing wall, and keeping a lid on tight all help the core stay active. Even then, expect the process to slow to a crawl from late autumn — that’s normal, not failure. Come spring, the pile restarts on its own.
In hot, dry climates the problem reverses. Plastic bins in full sun can bake their contents, killing the microbial activity and drying everything out. Shade, a lighter-coloured bin, and a periodic watering can keep things moving.
Wildlife is the concern that ends most composting attempts. The rule is simple: what goes in determines what shows up. Vegetable and fruit scraps, coffee grounds, eggshells, leaves and grass clippings attract little attention if they’re buried in the middle of the pile rather than left on top. Meat, dairy, cooked food and oily leftovers bring rats and raccoons. A sealed base, a tight-fitting lid and a small hole dug into the centre for each batch of kitchen scraps will handle the rest.
Neighbours deserve a mention too. A well-managed pile has a faint, earthy smell at worst. A neglected one announces itself. If you’re on a small suburban lot, keep the bin a metre from any shared boundary, keep the lid closed, and never leave fresh scraps exposed on the surface. Many local rules also set out minimum distances from property lines — worth a quick check before you commit to a spot.
Keeping it running: routine, troubleshooting and harvest
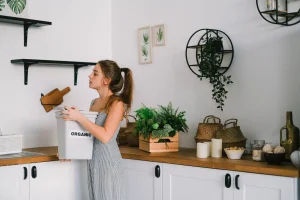
Once the bin is in place, the weekly routine takes about five minutes. Keep a lidded container in the kitchen. When it’s full, carry it out, dig a shallow pocket into the pile, tip the scraps in and cover them with a few handfuls of browns. That’s the whole job.
Beyond that, a short seasonal rhythm keeps things healthy. In spring and autumn, turn the contents and check moisture. In summer, watch for drying and add water if needed. In winter, do as little as possible and let the pile rest.
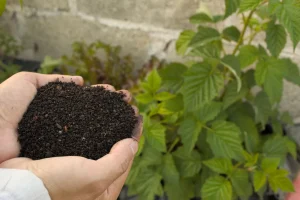
Harvest timing depends on your method. Hot piles can produce finished compost in as little as two to three months; cool piles often take six to twelve. The test is visual: finished compost is dark, crumbly, smells like forest floor, and you can no longer recognise the original ingredients. If you can still identify a banana peel, it isn’t done.
A practical approach is to run two batches. Fill one bin while the other matures, then alternate. That way you’re never adding fresh material to something that’s almost ready — the single most common reason home compost never seems to finish.
When problems appear, they’re nearly always one of three things. Smell means too wet or too many greens: add browns and turn. Nothing happening means too dry or too little nitrogen: add water, add grass clippings or kitchen scraps, and turn. Fruit flies mean exposed scraps: bury them deeper and keep the lid on.
Frequently asked questions
Can I compost on a balcony or in a very small yard?
Yes, with the right system. A worm bin handles a litre of kitchen scraps a day in a space smaller than a storage box, produces no odour when managed properly, and gives you a steady supply of worm castings. A small sealed tumbler also works if you have room to spin it and neighbours who won’t object to the sight. What you can’t do in a tiny space is process grass clippings or large volumes of leaves — those need ground space and airflow.
How long before I get usable compost?
It depends entirely on volume and management. A cubic metre of well-balanced material, turned regularly and kept damp, can finish in two to three months in warm weather. A small bin that’s fed a little at a time will take six to twelve months. Adding more material to a nearly finished pile resets the clock, which is why running two batches side by side speeds things up dramatically.
Will a compost bin attract rats?
Only if you give them a reason. Rodents are drawn by exposed food scraps, meat, dairy and cooked food — not by vegetable peelings buried in a working pile. Choose a bin with a base panel or mesh floor, keep the lid latched, bury every batch of kitchen scraps in the centre, and leave nothing on the surface. If rodents are already active in your area, an in-ground digester or a fully sealed unit is the safer route.
Can I keep composting through winter?
You can keep adding, but don’t expect much decomposition. Below roughly five degrees Celsius the microbial activity in a typical backyard pile slows to almost nothing. Keep adding material in thin layers, cover it well, and avoid turning — turning releases the warmth the core has built up. The pile will restart in spring, often quite suddenly.
Do I need a starter, accelerator or additive?
Usually not. The microorganisms you need are already present on plant material, in soil and in the air. What most struggling piles actually lack is the right balance: enough browns, enough moisture, and enough oxygen. A shovel of finished compost or garden soil mixed through a new pile does help it get going, and it costs nothing.
The short version
Choose your bin by working backwards from your waste, not forwards from a catalogue. Measure your weekly scraps for two weeks, add your seasonal yard waste, and let that number point you to a family: worm bin or small sealed unit for light kitchen-only households, a tumbler for tight spaces and low-effort turning, a stationary bin or wooden bay for real volume, a sealed digester for cooked food and small gardens.
Then get the two decisions right that people most often regret. Give the bin enough capacity — three to six months of material — and site it on level, well-drained ground, in partial shade, with clearance from fences and easy access in bad weather. A bin in the wrong place will be abandoned long before it wears out.
Finally, accept that a bin is a habit, not a purchase. Five minutes a week, a handful of browns every time you add scraps, and a fork through the pile every few weeks will outperform any feature list.
If you want to go further, the natural next reads are the ones that build on this foundation: how to balance greens and browns without weighing anything, how to set up and maintain a worm bin indoors, how to troubleshoot a smelly or stalled pile, and how to use finished compost in beds, containers and lawns. Start with the bin that fits your life today — you can always add a second one when the first one fills up.