Short answer : Solar panels in the UK convert daylight into electricity that can power your home, and any surplus can be exported to the grid or stored in a battery. A typical installation combines photovoltaic panels, an inverter to convert direct current into usable alternating current, and a monitoring system so you can track generation. Government incentives and export payments change over time, so verify current schemes directly with official sources. Panels generally require little maintenance beyond occasional cleaning and periodic checks, and their output varies with season and weather rather than being constant year-round.
In short
- South-facing roofs with a steep pitch and minimal shading usually generate the most electricity across the year.
- An inverter is essential because panels produce direct current while household appliances run on alternating current.
- Battery storage lets you use daytime generation in the evening instead of exporting it immediately to the grid.
- Check with your local council whether your property needs planning permission, especially in conservation areas.
- Compare several installer quotes and confirm certifications before signing, since quality and warranties vary widely.
How Solar Panels Work in UK Homes
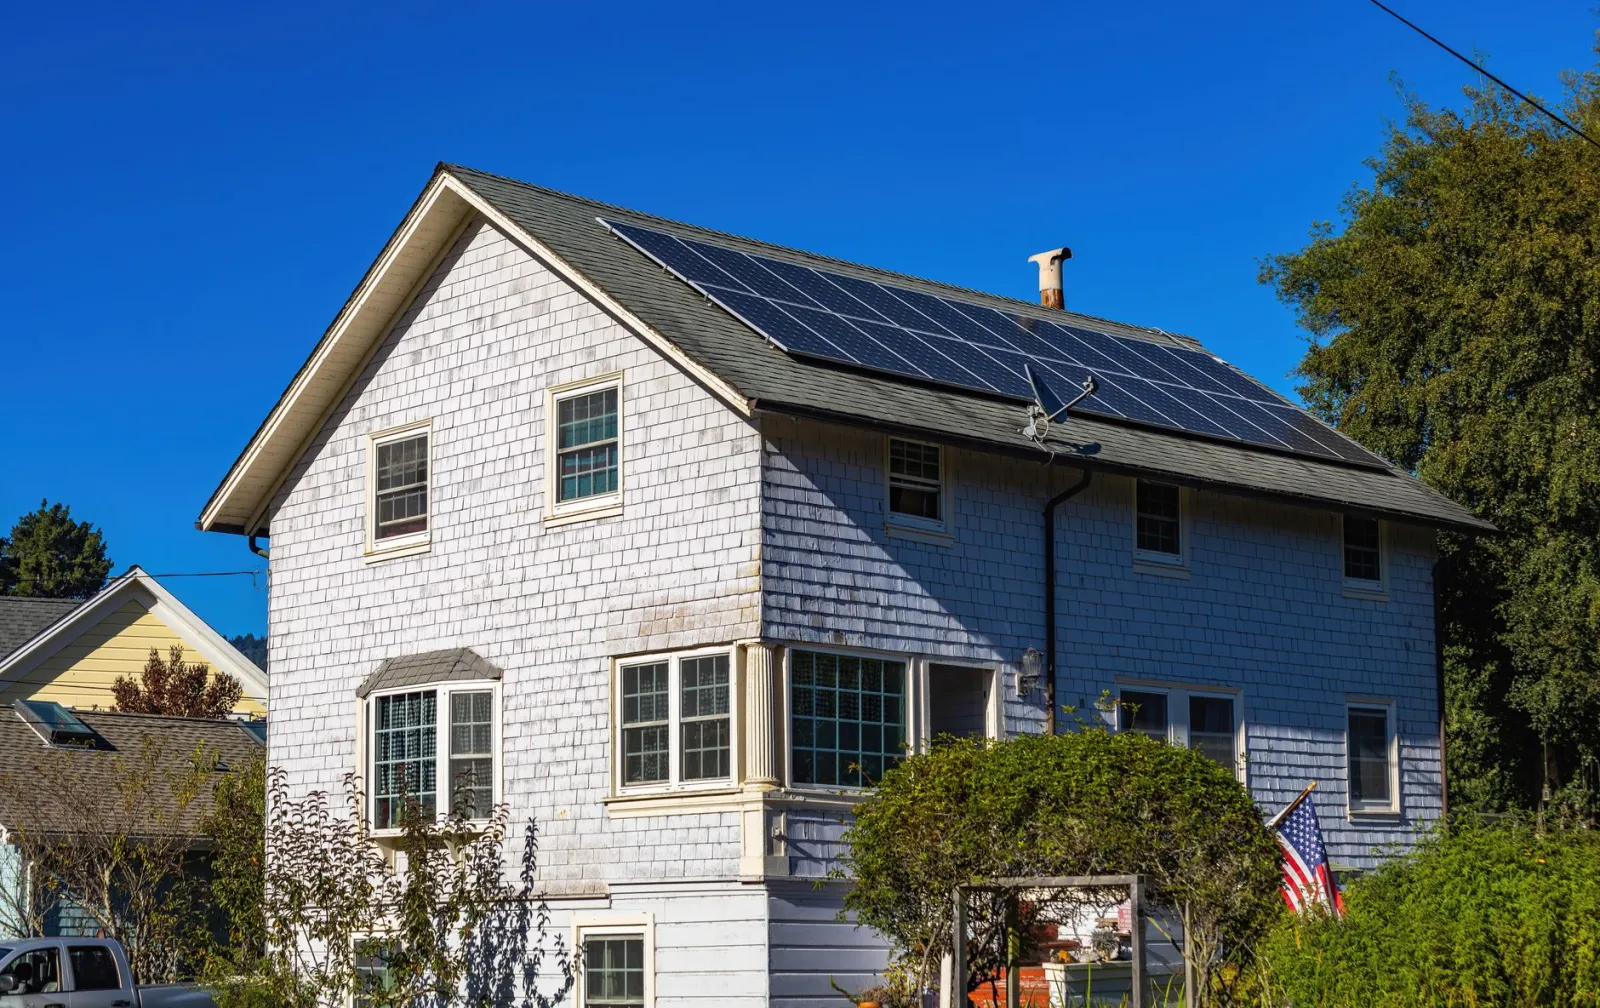
A solar photovoltaic system in a UK home turns daylight into usable electricity, and understanding the basic chain of components helps you judge what a quote is actually offering. The process starts at the panel itself, where silicon cells convert light into direct current (DC). This happens whenever there is daylight, not only in direct sunshine, so a bright but overcast day still produces output, just at a lower level. Panels are typically mounted on a pitched roof facing between south-east and south-west to capture the most light across the day, though east and west orientations still generate useful electricity, simply spread more evenly across morning and afternoon.
The DC electricity then passes to an inverter, usually installed indoors in a loft, garage or utility area. The inverter’s job is to convert DC into alternating current (AC) that matches the voltage and frequency your household appliances and the grid expect. In most UK setups a single string inverter serves the whole array, while some installations use micro-inverters or power optimisers behind individual panels to manage shading or complex roof shapes. Inverter efficiency matters because losses here affect everything the panels produce, and it is the component most likely to need replacing during the system’s life.
Once converted, the electricity flows first to whatever is running in the home at that moment. Self-consumption is the priority because it avoids buying that unit from your supplier. Anything the house does not use at that instant is either exported to the grid or, if you have a battery, stored for later. A battery shifts generation from midday to the evening peak, which suits households that are out during the day, while homes with high daytime use such as those working from home or running heat pumps may find less value in storage.
How much a system generates depends on roof size, orientation, tilt, shading and local weather rather than on a single headline figure. A well-oriented, unshaded roof in southern England will outperform a shaded or north-facing roof of the same size, and seasonal variation is significant, with summer months producing far more than midwinter. Shading from chimneys, trees or neighbouring buildings affects panels disproportionately because a shaded cell can drag down the output of the panels connected with it, which is why surveyors assess shading at different times of day.
Finally, the system connects to the grid through your consumer unit and a generation meter, and any export is handled under your supplier’s export arrangement. A smart meter or export meter records what leaves the property. Understanding this flow, from panel to inverter to home to grid or battery, is the foundation for reading installer proposals critically and for deciding whether battery storage or a particular panel layout is worth the extra cost for your household’s pattern of electricity use.
Key Criteria When Choosing Solar Panels
Choosing solar panels for a UK home is less about chasing the highest headline wattage and more about matching the technology to your roof, your shading, and how you use electricity. The first practical criterion is cell technology. Monocrystalline panels dominate the residential market because they deliver more power per square metre, which matters on the compact and often irregular roofs typical of British housing. Polycrystalline panels cost less per unit but need more surface area for the same output, so they suit larger, unshaded roofs where space is not at a premium. Thin-film options are lighter and perform comparatively better in diffuse, overcast light, but they demand substantially more roof area, which rarely works on a standard terraced or semi-detached home.
Efficiency deserves attention, but in context. A more efficient panel generates more kilowatt-peak from the same footprint, so on a small roof it can be the difference between meeting a meaningful share of your demand and falling short. On a generous roof, a slightly lower-efficiency panel at a better price can make more financial sense. Rather than fixating on the single best number, compare how much usable capacity a given panel array actually fits on your available, unshaded roof area.
Temperature behaviour is an underrated factor in the UK. Panel output falls as cells heat up, and while British summers are mild, panels mounted flush against a roof can still get warm on bright days. Panels with better temperature coefficients lose proportionally less output as they heat, which supports performance during the sunniest afternoons when generation peaks. Related to this is low-light performance: the UK spends much of the year under cloud cover, so how a panel behaves in diffuse light shapes its real-world annual yield more than its peak rating suggests.
Shading tolerance and system design go hand in hand. A single shaded panel can drag down the output of others on the same string unless the system uses optimisers or micro-inverters to isolate each panel’s contribution. Homes with chimneys, dormers, trees, or neighbouring buildings should weigh this carefully, because the cost of per-panel electronics may be justified where shading is unavoidable. Warranties and build quality are the final filter: look for a meaningful product warranty alongside a separate performance guarantee that specifies how much output is protected over time, and favour manufacturers with a established track record. For most homeowners, the right choice balances efficiency, low-light and heat behaviour, shading resilience, and warranty support against the physical limits of the roof itself.
Roof Suitability and Shading Checks
Before any conversation about panel types or inverter choices, a solar installation lives or dies on the roof beneath it. The first question is orientation: in the UK, a roof facing roughly south captures the most annual generation, while east- and west-facing roofs still work well but spread output across morning and evening rather than peaking at midday. A north-facing roof is rarely worth pursuing unless the pitch is very shallow or the array can be split across other planes. Pitch matters too: most UK homes sit between 30 and 45 degrees, which is close to ideal, and both flatter and steeper roofs can still perform, though very shallow pitches shed rain and dirt less effectively and steeper ones catch more low winter sun.
Shading is the factor most likely to undermine an otherwise good roof. A chimney, a dormer, a mature tree or a neighbouring building casting shadow across part of the array can disproportionately reduce output, because shading on one panel can drag down the performance of others wired in the same string. Even a thin band of shadow moving across the roof during the middle of the day deserves attention. Observe the roof at several points through the day and across seasons, since a tree that is harmless in winter may block the sun for hours in summer when it is in leaf.
Roof condition and structure come next. Solar panels are expected to last decades, so fitting them to a roof that will need replacing soon means paying to remove and refit the array later. Check the age and condition of the tiles or slates, the state of the battens and the integrity of the waterproofing. The structure must carry the additional load, which for most domestic arrays is modest but should still be confirmed for older or unusual roofs. Access for installation and later maintenance matters as well: scaffolding is typically required, and a roof that is awkward to reach adds cost and complexity.
Material and shape influence the approach. Slate, tile and standing-seam metal roofs each need different mounting methods, and some, such as certain older or fragile coverings, call for specialist fixings. Flat roofs are workable using tilted frames, though spacing between rows to avoid one row shading the next becomes important. Listed buildings and homes in conservation areas may face planning constraints on visible panels, so it is worth checking before committing.
A practical assessment combines these points: note the roof’s direction and pitch, track shading hour by hour on a clear day, judge the remaining life of the covering, and confirm the structure and access. Where shading is unavoidable, the layout can often be adjusted or the system designed to limit its impact, but the roof itself sets the ceiling on what is achievable.
Inverter and Battery Storage Choices
The inverter is the component that turns the direct current your panels produce into usable alternating current, and it is also the part most likely to need replacing first. Most domestic systems use a string inverter, a single box usually mounted near the consumer unit or in a garage, which is the simplest and cheapest option but creates a single point of failure and limits how panels on different roof orientations perform together. If your roof is split across several aspects or partly shaded, micro-inverters or power optimisers fitted at panel level let each module work independently, recovering output that a string inverter would lose, at a higher upfront cost and with more electronics on the roof to maintain. Ask how the inverter handles shade and whether it accepts a battery connection later, since retrofitting storage to an inverter that was never designed for it usually means replacing the inverter too.
Battery storage changes the economics of a system more than any other add-on, because it lets you use midday generation in the evening instead of exporting it. The decision hinges on your usage pattern rather than on the battery itself. A household that is out all day and consumes most electricity in the evening gains far more from storage than one where someone is home during daylight hours, since the latter can self-consume directly. Think about your evening and overnight demand, your typical daily consumption, and whether you plan to add an electric vehicle or a heat pump, both of which raise consumption and make a larger usable capacity more worthwhile.
When comparing batteries, look past the headline capacity figure to the usable capacity, which is always lower because manufacturers reserve a margin to protect the cells. A battery with a long warranty expressed in both years and throughput is generally a safer bet than one warranted on years alone, since heavy cycling can exhaust a weakly specified unit well before the calendar warranty expires.
Consider whether you want a DC-coupled or AC-coupled battery. DC-coupled storage connects to the same inverter as the panels and avoids an extra conversion step, which suits a new installation designed as a whole. AC-coupled batteries are added alongside an existing solar system and are the practical route for retrofit, letting you keep your current inverter. Also check the backup capability: some systems can keep selected circuits running during a grid outage, but this requires specific inverter and gateway hardware and should be specified at the design stage rather than added afterwards.
Finally, weigh the practical constraints of where the equipment will live. Batteries and inverters need a dry, ventilated, frost-free location, and some units are rated for outdoor installation while others are not. Space, noise from cooling fans and the distance to the consumer unit all affect installation cost and complexity. A slightly smaller battery in a well-sited, well-integrated system often serves a household better than a larger one squeezed into an unsuitable location.
Understanding UK Solar Panel Certifications
Certification is one of the least glamorous parts of buying solar panels in the UK, yet it is where a surprising number of installations quietly go wrong. The UK does not have a single “solar panel licence,” so quality is signalled through a patchwork of product standards, installer competence schemes, and grid-connection requirements. Understanding which certificates matter, and what each one actually proves, helps you ask better questions before you sign anything.
Start with the products themselves. These certificates tell you the equipment has been type-tested to a recognised benchmark rather than assembled to an unknown spec. Ask to see the certificate for the exact model being quoted, not a generic brochure claim, because manufacturers revise designs and a certificate for an older version does not automatically cover a newer one.
Installer competence is a separate question from product quality. Confirm the certification is current and covers the type of work being done, including any battery storage.
For the connection itself, installations must comply with the wiring regulations and with the distribution network operator’s requirements for connecting generation to the grid. Your installer should handle notification and approval, but you should know it is happening. A domestic system is usually straightforward, yet the paperwork still needs to be correct, and a rushed job that skips it can cause problems later when you sell the property or claim export payments.
Finally, treat certificates as a starting point rather than a guarantee. Use the certificates to filter out the obviously unqualified, then judge the installation on the detail: a clear handover pack, documented commissioning, and a realistic explanation of performance. If a quote cannot produce the relevant certificates on request, that is a useful signal in itself.
Installation Process and What to Expect
The installation itself is usually the shortest phase of the whole project, but it is the part most homeowners worry about. Once your survey is complete and your installer has confirmed the design, the physical work on a typical pitched-roof house generally takes a day or two, with larger or more complex systems stretching to three. Scaffolding usually goes up the day before and comes down a day or so after the panels are fitted, so plan for the house to be surrounded by equipment for a few days even though the noisy work is brief. Most of the disruption happens outside; inside, the main intrusion is the cable route from the roof to wherever the inverter and consumer unit sit, which may mean a short period of drilling and lifting floorboards.
Before anyone arrives, it helps to clear access to the loft, the meter cupboard and the consumer unit, and to move any vehicles from the driveway. Installers will need a safe working area around the scaffolding and a clear run for carrying panels, which are large and awkward to manoeuvre. If you have a loft conversion, a fragile roof covering or a thatched or listed property, expect more preliminary discussion, because mounting methods and cable routing have to be agreed in advance rather than improvised on the day.
On the day, the sequence is fairly predictable. The scaffolding is checked, roof mounts or rails are fixed, panels are lifted and secured, and the DC cabling is run to the inverter location. The inverter is mounted, connected to the consumer unit, and the system is commissioned and tested. Your installer should then walk you through the monitoring app or display, explain how to read generation, and hand over the documentation you will need, including the electrical certificate and the notification to your distribution network operator. Ask for this handover to be done in person rather than left as a folder on the kitchen table, because it is your best chance to ask questions while the installer is still on site.
Expect some paperwork and a short wait before everything is fully live. The system may need to be registered before export payments begin, and the DNO may need to approve the connection, particularly for larger systems. Keep copies of every certificate and registration confirmation. After installation, check the monitoring for the first few weeks to confirm generation matches expectations on clear days, and note any sudden drop, which usually points to an isolator trip, a communication fault or shading rather than a failed panel. A brief visual check of the panels from ground level after storms is worthwhile, but avoid climbing on the roof yourself.
Maintenance and Cleaning for UK Weather
Maintenance and cleaning for UK weather comes down to managing three things: dirt, water, and wind. In most of the UK, rain does a reasonable job of rinsing panels, so heavy cleaning is rarely needed. The bigger issue is what rain leaves behind. Pollen in spring, dust and agricultural spray in rural areas, salt film on the coast, and bird droppings anywhere near trees or rooflines all reduce output gradually rather than dramatically. A useful rule of thumb is to inspect visually a couple of times a year, in spring and early autumn, and clean only when you can see a dull film, streaks, or droppings. Cleaning a lightly soiled array buys little; cleaning a heavily soiled one restores meaningful generation.
Timing matters more than technique. Clean on a cool, overcast morning rather than in strong sun, because cold water on hot glass risks thermal stress and the water evaporates before you can wipe it, leaving streaks. Use a soft brush or squeegee on an extension pole and plain water, or a mild soap solution for greasy deposits. Never use abrasive pads, scouring powder, or harsh solvents, and avoid pressure washers directed at the frame edges and junction boxes, where seals can be forced. Stay off the roof unless you have proper access equipment and fall protection; for most homeowners, ground-level reach with a pole, or a professional visit, is the sensible route.
UK winters bring specific concerns. Snow rarely sits long on pitched panels, and it slides off as it thaws, but avoid scraping ice or snow with metal tools, which scratches the glass and anti-reflective coating. More important is checking after storms for displaced tiles, debris lodged behind the array, or damaged cabling. Coastal properties should rinse salt residue more often, since salt film is stubborn and slightly conductive. Properties under trees should check gutters and the panel edges for moss and leaf litter, which trap moisture and can encourage growth along the frame.
Beyond cleaning, a light annual check pays off: look for cracked glass, loose mounting clamps, sagging cables, and any shade that has crept in from a growing hedge or new extension. Shading losses are easy to overlook and often cost more than dirt. If your inverter app or generation meter shows an unexplained drop over several weeks, check for soiling and shading before assuming a fault. Keep a simple log of cleaning dates and observed output so you can spot trends. For most UK homes, two light cleans a year plus a post-storm inspection is enough; anything involving roof access, electrical components, or persistent underperformance is best handed to an accredited installer.
Common Mistakes to Avoid
The most frequent mistake is sizing a system around a budget figure rather than around actual household consumption. A system that is too small leaves you importing grid electricity for much of the evening, while an oversized array produces export that is paid at a lower rate than the import you are trying to displace. The sensible starting point is a year of electricity bills, ideally with half-hourly or hourly usage data if your supplier provides it, so the array and any battery can be matched to when you actually use power. Households that are out during the day and use most electricity in the evening get far more value from a battery than from extra panels.
Roof orientation and shading are routinely underestimated. A south-facing roof at a reasonable pitch is ideal, but east and west aspects still generate useful output, just spread across the morning and evening rather than concentrated at midday. The bigger risk is shading: a chimney, a dormer, a mature tree or a neighbouring building can cut output from part of the array, and shading affects panels disproportionately because a shaded panel can drag down the performance of others on the same string. Ask for a shading assessment and check whether optimisers or micro-inverters are being proposed and why, rather than accepting a generic quote.
Skipping the structural and paperwork side is another common error. The roof must be sound before panels go on, because removing and refitting an array to repair a roof later is expensive. Listed buildings, conservation areas and some flats can require planning permission even though most domestic rooftop installations fall under permitted development, so confirm the position for your property before signing. You also need to notify your distribution network operator and ensure your meter is suitable for export, and you should check your home insurance covers the installation.
Choosing on headline price alone tends to backfire. A cheap quote may exclude scaffolding, bird-proofing, an inverter upgrade or the electrical work needed to connect to your consumer unit, and those extras can add substantially to the final bill. Compare quotes on the same scope, ask what warranty covers the panels, the inverter and the workmanship separately, and check how long the installer has been trading and whether they will still be around to honour a workmanship guarantee. A long product warranty is of little use if the company that fitted it has disappeared.
Finally, many homeowners underestimate how much behaviour changes the payback. Running a washing machine, dishwasher or immersion heater during daylight, or scheduling an electric vehicle charge for the middle of the day, uses generated power directly instead of exporting it cheaply and buying it back expensively in the evening. Without that shift, even a well-designed system underperforms its potential, and the shortfall is easy to miss because it never appears as a line on a bill.
Budgeting and Payback Considerations
Budgeting for solar starts with accepting that the upfront cost is the largest number in the whole exercise, and that the payback figure you see quoted online is almost never the one your household will experience. Treat any advertised payback period as a rough orientation rather than a promise. The honest way to budget is to build your own estimate from three inputs you can actually observe: your annual electricity consumption in kilowatt-hours, the share of that consumption a well-sized array could realistically cover given your roof and usage pattern, and the current unit rate you pay for grid electricity. Multiply the offset energy by your unit rate to get an annual saving figure, then compare it with your quoted installed cost. That simple division gives a personal payback estimate that is far more useful than a generic headline.
The single biggest variable in that calculation is self-consumption — how much of the generated electricity you use in the home rather than export. A household that is out all day and runs appliances in the evening will export a large share of midday generation, often at a lower rate than it pays for imports, which stretches payback considerably. A household with someone at home during the day, or that shifts heavy loads like washing, dishwashing and water heating into daylight hours, captures far more value per kilowatt-hour generated. Before committing, walk through a typical weekday and weekend and ask honestly when your demand actually peaks; if the answer is “after dark,” budget for the fact that your payback will be longer unless you change habits or add storage.
Battery storage changes the arithmetic in both directions. It raises the capital cost meaningfully and adds a component with a finite service life, but it lets you bank daytime generation for evening use and provides some resilience during outages. The case for a battery is strongest where evening consumption is high, where export rates are unattractive relative to import rates, and where the household values backup power independently of financial return. If those conditions don’t apply, a well-sized array without storage often delivers the cleaner financial case, and storage can be added later as prices and products evolve.
Financing choices deserve as much attention as the hardware. Paying outright gives the shortest simple payback and avoids interest costs. A loan spreads the outlay but adds interest that lengthens the effective payback, so compare the total repayable against projected savings rather than looking only at the monthly payment. Green mortgage products and property-linked finance exist, but terms vary widely, so read the total cost of credit carefully.
Finally, budget for the whole system, not just the panels: scaffolding, mounting, inverter replacement within the system’s life, and any electrical remedial work can all add to the quoted figure. Keep a contingency, and ask for a breakdown in writing so you can see what is included. Payback also depends on how long you stay in the property — if a move is likely within a few years, weigh the resale value of an owned system against the unrecouped cost, since savings accrue to whoever lives there.
Grid Connection, Export and Paperwork
Connecting a domestic solar array to the grid is less about the panels themselves and more about satisfying your distribution network operator (DNO), your energy supplier, and building control. The sequence matters: most of the paperwork is triggered before installation, not after, and skipping a step can mean a system that generates but cannot legally export.
Start with the DNO. In the UK, any grid-connected generation needs notification or approval, and the route depends on system size. Small domestic systems usually qualify for a simplified notification process, while larger arrays or those with battery storage may need a formal application and can be offered a connection with export limitations. Your installer normally handles this, but you should confirm who is submitting what and keep copies of the approval. A common delay is assuming approval is automatic; it is not, and the DNO can require reinforcement work or restrict export if the local network is constrained.
Next comes metering and your supply contract. To be paid for exported electricity you need an export meter or a smart meter configured to record export, plus a supplier that offers an export tariff. Not all suppliers do, and rates vary, so it is worth comparing before you commit. If you install battery storage, decide early whether you want to prioritise self-consumption over export, because this affects how the system is wired and registered. A household that is out all day may export more than one that runs appliances during daylight, and the tariff structure should reflect that pattern.
Building regulations and electrical certification run alongside the DNO process. The installation must comply with Part P of the Building Regulations in England and Wales, and you should receive an Electrical Installation Certificate and a building regulations compliance certificate. For properties in conservation areas or listed buildings, planning permission may also be needed, so check before ordering equipment. Keep all certificates together: they are requested when you sell the property and sometimes by insurers.
Finally, register for any applicable export or smart export guarantee scheme through your supplier, and confirm the handover pack includes the DNO approval, the commissioning certificate, and the meter registration confirmation. A well-documented installation is easier to maintain, easier to insure, and far easier to sell with the house.
Frequently asked questions
How do solar panels perform in UK weather?
Solar panels work on daylight rather than direct sunshine, so they still generate electricity on overcast days, just at a reduced output. Cooler temperatures can actually help efficiency, since panels lose performance when they get very hot. The main variable is how much light reaches the roof, so shading from trees, chimneys or neighbouring buildings matters more than the region you live in. Panels are designed to shed rain and withstand frost, hail and wind, so typical UK conditions are well within their design limits.
Do I need planning permission for solar panels?
In most cases, roof-mounted solar panels fall under permitted development in England and Scotland, meaning you don’t need to apply for planning permission. There are conditions: the panels should not protrude significantly beyond the roof slope, and they are not usually allowed on a listed building or in a conservation area without consent. Rules differ in Wales and Northern Ireland, and flats or shared buildings may need freeholder or landlord agreement. Always confirm with your local planning authority before ordering.
How much roof space do solar panels need?
The space needed depends on the panel wattage and how much electricity you want to generate. As a rough guide, a typical domestic panel is around 1.7 square metres, and a common installation of ten to twelve panels occupies roughly a third of an average semi-detached roof slope. South-facing roofs are ideal, but east or west-facing slopes still work with a modest output reduction. Panels can be fitted flush to pitched roofs or on flat roofs using tilted mounting frames.
What maintenance do solar panels require?
Maintenance is minimal. Rain usually keeps the glass reasonably clean, though dust, bird droppings, pollen or tree sap can build up and slightly reduce output, so occasional gentle cleaning with water and a soft brush helps. Keep an eye on shading from overgrown trees and check that mounting brackets and cabling remain secure. Most installers recommend a periodic inspection of the inverter and connections. Inverters typically have a shorter lifespan than panels and may need replacing at some point.
Can I add a battery to my system later?
Yes, in many cases a battery can be retrofitted, but it is easier and often cheaper to plan for one at the outset. Whether a retrofit is straightforward depends on the inverter type and whether the system was designed with battery compatibility in mind. Hybrid inverters make later additions simpler. If you think you may want storage in future, tell your installer during the survey so they can specify suitable equipment and leave space for the unit, which is usually sited indoors or in a garage.
How does exporting surplus electricity work?
When your panels generate more electricity than your home is using, the surplus flows to the grid. Under the Smart Export Guarantee, licensed energy suppliers must offer a payment for electricity you export, though rates and terms vary between suppliers, so it pays to compare. A smart meter is normally required to measure exports. If you have a battery, you can store surplus instead and use it later, which often makes more financial sense than exporting at low rates.
Are solar panels worth it in the UK?
Whether panels are worth it depends on your roof, your electricity use and how long you plan to stay. A well-oriented, unshaded roof with daytime electricity use tends to give the best return, especially if you can use generated power directly or store it in a battery. Solar reduces reliance on grid electricity and can lower bills over time. Get several quotes, check the expected yield for your specific roof, and compare against your current energy costs before deciding.
How long do solar panels typically last?
Most solar panels come with performance warranties of around twenty to twenty-five years, and many continue generating beyond that at a gradually reduced output. The inverter is usually the first component to need replacement, often after roughly ten to fifteen years. Panels have no moving parts, so wear is limited, but mounting hardware, cabling and connectors should be checked periodically. Choosing a reputable installer and quality components is the best way to maximise system lifespan.
Put it into practice : How much does it cost to install a solar panel?
Read next :Best Fridges: How to Choose the Right One
Read next :Christmas Jumpers for Dogs: A Complete Buying Guide
Read next :Best Indoor Plants for Air Purification: A Buyer’s Guide
Full guide :Sustainable Home
More from this guide :
Was this guide helpful?
Share your experience with the WiseHomeGuides community.