This article contains Amazon affiliate links. As an Amazon Associate we earn from qualifying purchases.
Short answer : The best compost bin for you depends on how much kitchen and garden waste you generate, how often you can tend the pile, and whether pets or wildlife can reach it. For most households, a lidded, rodent-resistant bin with a secure base is the practical starting point, because it controls smells, keeps animals out, and holds heat for faster breakdown. Choose a larger capacity if you compost yard trimmings as well as scraps, and a smaller, sealed countertop or porch unit if you mainly collect food waste before moving it to an outdoor system. Whichever style you pick, plan for airflow, drainage, and easy access to finished compost, since these features determine how manageable the bin stays week to week.
In short
- Pick a lidded bin with a locking or weighted base to keep pets and wildlife out of food scraps.
- Match capacity to your waste: small sealed units for kitchen scraps, larger bins for garden trimmings.
- Ensure airflow through vents or turning access, plus drainage holes so the pile does not turn soggy.
- Place the bin on level, accessible ground away from fences pets can dig under or climb.
- Balance greens and browns and turn regularly to reduce odors and speed up finished compost.
What a Compost Bin Actually Does for Your Household

A compost bin is, at its core, a controlled environment for decomposition. Instead of letting food scraps and yard waste rot in a loose pile or, worse, travel to a landfill in a plastic bag, you give microorganisms and invertebrates the conditions they need to break material down efficiently. The bin’s job is to manage three variables at once: moisture, airflow, and the balance of what goes in. Get those roughly right and the pile stays aerobic, which means it breaks down without the sour, putrid smell that drives people away from composting in the first place. Get them wrong and you get a slimy, anaerobic mess.
For a household, the practical value shows up in the kitchen and the yard simultaneously. A bin diverts a steady stream of vegetable peels, coffee grounds, eggshells, and spoiled produce from your regular waste, which means fewer trips to the curb and a lighter, less pungent trash bag in the meantime. In the garden, the finished material returns organic matter to the soil, improving its structure and its ability to hold moisture. That closed loop—scraps out of the waste stream, compost back into the beds—is the real payoff, and it works whether you have a large yard or a few containers on a patio.
Different bins suit different situations, and the choice matters more than any single feature. An open or tumbler-style bin works well for someone with outdoor space and a reasonably steady supply of both “greens” (kitchen scraps, fresh grass clippings) and “browns” (dry leaves, cardboard, shredded paper). A sealed indoor unit, by contrast, is designed for people without a yard or with limited outdoor space, and it handles food waste specifically rather than garden debris. The right pick depends on how much material you generate, how much space you have, and how much hands-on turning you’re willing to do.
Pet owners have a particular stake in this. Dog and cat waste should not go into a standard compost bin, because home systems don’t reliably reach the temperatures needed to break down the pathogens involved, and the resulting compost shouldn’t be spread on vegetable beds. What a bin does help with in a pet household is the surrounding mess: it gives you a dedicated place for the non-pet organic waste that would otherwise pile up, and it keeps the yard tidier, which matters if you have an animal that investigates everything. Some owners also use bins for pet-safe bedding materials like straw or shredded paper, provided those are kept separate from waste.
Finally, a bin sets expectations. It tells you how often you need to add material, how often to turn or aerate, and when to expect finished compost—typically a matter of months rather than weeks for most home systems, depending on climate and management. That predictability is what turns composting from an experiment into a routine, and a routine is what keeps material out of the landfill week after week.
Indoor vs Outdoor Compost Bins: Choosing the Right Setup
The first decision to make is where the bin will actually live, because indoor and outdoor systems solve different problems and are built around different constraints. An indoor bin is designed to sit under a sink, in a pantry, or on a counter, so its defining traits are a tight-sealing lid, a compact footprint, and odor and pest control. An outdoor bin is built for volume and exposure, so its defining traits are weather resistance, drainage, airflow, and the ability to handle garden waste alongside kitchen scraps. Choosing between them is less about which is “better” and more about matching the system to your space, your waste volume, and how much attention you can give it each week.
Indoor bins suit households that generate modest amounts of kitchen scraps and want to avoid repeated trips outside, particularly apartment dwellers, renters, or anyone in a cold climate where a trek to the backyard in winter kills the habit. The trade-off is capacity and management: indoor units fill quickly, so they work best when paired with a regular emptying routine into a larger outdoor system or a collection service. Odor control depends heavily on sealing quality and on how well you balance wet scraps with dry material, so an indoor bin rewards consistent, small-batch attention rather than long storage.
Outdoor bins are the better fit when you have yard space, generate garden waste, and want a system that can process material in volume over time. They handle leaves, trimmings, and larger quantities of kitchen scraps that would overwhelm an indoor unit, and they let airflow and outdoor temperature do much of the work. The catch is that outdoor bins are exposed to rain, heat, and pests, so drainage, lid fit, and placement matter more than they do indoors. A bin that sits in standing water or full sun will turn anaerobic or dry out, and a loose lid invites animals.
A practical middle path is to run both: a small sealed indoor container for daily scraps and a larger outdoor bin for finishing the compost. This keeps the kitchen tidy while giving the outdoor system time to break material down, and it reduces how often you carry scraps outside. If you can only choose one, let your waste volume and living situation decide. Small space and limited scraps point to indoor; yard access and garden waste point to outdoor. Either way, the bin only works if the routine around it is realistic for your household.
Tumbler Compost Bins: Turning Waste Without the Backache
A tumbler compost bin solves the specific problem of turning a pile that has become too heavy or awkward to manage with a fork. Instead of lifting and mixing material in place, you load the drum, close the lid, and rotate the whole body around a central axis using a handle or crank. The mechanical advantage does the work that your back and shoulders would otherwise absorb, which matters most for anyone managing a large volume of kitchen scraps or garden waste on their own.
The practical case for a tumbler rests on aeration. Frequent turning introduces oxygen throughout the batch rather than just at the surface, and consistent aeration is what keeps a compost pile working aerobically rather than going anaerobic and stagnant. Because a tumbler makes turning a low-effort, few-seconds action, owners tend to do it more often, and that regularity is where the real benefit sits. The trade-off is batch capacity: most drums hold a limited volume, so a tumbler suits households generating steady but moderate amounts of material rather than large volumes of bulky garden debris at once.
Design details worth checking before choosing one. Look at how the drum is supported, since a single central axle and a sturdy frame handle weight more predictably than a drum resting on small rollers. Consider the door and latch arrangement, because a wide opening makes loading and unloading easier while a secure latch keeps animals and rain out. Ventilation holes along the drum help airflow, and a base that raises the drum off the ground improves both turning clearance and drainage. Dual-chamber designs let you fill one side while the other finishes, which reduces the waiting bottleneck of single-batch units.
For pet owners, the tumbler’s enclosed design is a genuine advantage. A sealed drum keeps dogs and cats away from food scraps and keeps odors contained better than an open pile, and the elevated position limits access from the ground. The same enclosure discourages rodents and flies that an open heap attracts. Keep in mind that pet waste should not go into compost intended for edible gardens, so the enclosed format is about managing household food scraps and garden material hygienically, not about processing waste itself.
Usage patterns matter as much as the hardware. Tumblers work best when you balance greens and browns as you load, add material in layers rather than dumping wet scraps in a single mass, and turn every few days. In cold weather, a tumbler’s smaller mass cools faster than a large ground pile, so expect slower decomposition through winter and plan capacity accordingly. For a household with moderate kitchen output and a preference for low-effort turning, a tumbler is a sound fit; for someone with abundant garden waste, a larger static system may serve better.
Countertop Compost Bins for Kitchen Scraps
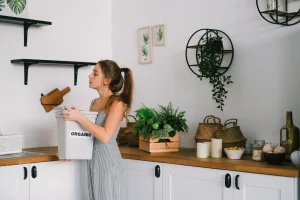
Countertop compost bins serve a different purpose from outdoor systems: they hold kitchen scraps for a few days until you can transfer them to a larger pile, tumbler, or municipal collection. Because they sit on a counter or under a sink, the priorities shift toward odor control, a secure lid, and a size that fits your cooking rhythm rather than maximum capacity.
The most important decision is whether you want a simple collection container or a bin that actively processes scraps. A basic countertop caddy is essentially a sealed bucket with a lid and often a charcoal filter; it holds material temporarily and does nothing to break it down. An electric kitchen composter grinds and aerates scraps and evaporates moisture over many hours, reducing volume substantially and producing a dry, soil-like output. The first is inexpensive and low-effort but requires frequent emptying; the second costs considerably more, occupies counter space, and needs power, but it lets you go longer between trips to the outdoor bin.
Ventilation and sealing are what separate a pleasant experience from a fruit-fly problem. Look for a lid that closes firmly, ideally with a gasket, and a filter compartment you can actually access and replace. A bin with a wide opening is easier to fill without smearing the rim, while a narrow mouth reduces airflow and odor. Foot-pedal lids help because you avoid touching the bin with messy hands, and a removable inner bucket makes rinsing far simpler than hauling the whole unit to the sink.
Size should match how often you cook. A household producing a handful of peels and coffee grounds daily does well with a compact caddy that empties every couple of days; larger households or people who cook from scratch frequently benefit from a bigger container or an electric unit that tolerates several days of accumulation. Material matters too: stainless steel resists staining and odors, while plastic is lighter and cheaper but can absorb smells over time if not cleaned regularly.
For pet owners, countertop bins earn their place by keeping food scraps out of reach. A sturdy lid and a heavier base make it harder for a determined dog or cat to tip the bin or pry it open, and keeping scraps contained indoors reduces the temptation to leave them in an open bowl. Whichever type you choose, plan on rinsing the bin regularly and lining it with a compostable bag or newspaper to simplify cleanup, and empty it often enough that odor never becomes the reason you stop composting.
Worm Composting Bins for Small Spaces and Apartments
Worm composting, or vermicomposting, suits apartments better than almost any other bin style because it works in a compact footprint and produces no turning or aeration routine. Instead of a large outdoor pile, you keep a shallow, covered tray system indoors, often tucked under a sink, in a closet, or on a balcony. The worms do the mixing as they move between bedding and food, so the bin stays low-maintenance and quiet. The main trade-off is that worms process food more slowly than a hot outdoor pile, so this approach rewards households that generate modest kitchen scraps rather than large volumes.
The first practical criterion is size relative to your waste. A worm bin is typically sized by surface area rather than height, since worms feed near the top layers and need shallow depth to breathe. As a rule of thumb, a small under-sink tray suits a one- or two-person household producing a few handfuls of fruit and vegetable trimmings a day, while a larger multi-tray unit fits a family. If you routinely cook for a crowd or juice in bulk, a single compact worm bin will fall behind, and you should either size up or accept that some scraps go elsewhere. Overfeeding is the most common failure in small spaces, so match capacity to realistic daily output rather than to your best intentions.
Ventilation and moisture control matter more indoors than outdoors. A good worm bin has a lid with airflow and a drainage or collection base to keep excess liquid away from the bedding. In an apartment, choose a design that seals reasonably well to contain odors and discourage fruit flies, but never airtight, because the worms and their bedding need oxygen. Bedding should stay consistently damp like a wrung-out sponge; too wet and it turns anaerobic and smelly, too dry and the worms suffer. Keep a supply of dry bedding, such as shredded paper or cardboard, on hand to soak up moisture when scraps are watery.
Placement is a real constraint in apartments. Worm bins do best in a spot that stays moderate and stable, away from radiators, direct sun, and freezing balconies. A cupboard, a shaded corner, or an insulated balcony in mild climates works well. Temperature swings are the enemy of a healthy bin, so avoid spots that heat up or chill sharply through the day. Weight is also worth considering: a fully loaded tray is heavier than it looks, so choose a shelf or floor spot that can carry it and that you can reach comfortably for feeding and harvesting.
For pet owners, worm bins offer a tidy way to handle some pet-related organic waste, though the fit depends on the animal. Herbivore bedding and droppings, such as from rabbits or guinea pigs, can often go into a worm bin in moderation, while dog and cat waste should stay out because of pathogen concerns and odor. Keep the bin out of reach of curious pets, since a determined dog or cat can tip a lightweight tray. Used alongside a conventional bin for larger jobs, a worm bin rounds out a small-space composting setup and yields a rich castings harvest for houseplants and container gardens.
How to Keep Pets Out of Your Outdoor Compost Bin
Keeping pets out of an outdoor compost bin comes down to three layers of defense: a barrier the animal cannot open, a placement that removes easy access, and a management routine that keeps the bin from smelling like food. The barrier matters most. A bin with a fully latching lid, a body that sits flush to the ground, and no gaps wider than a paw is far harder for a determined dog to breach than a loose-fitting lid or a tumbler with an open base. For dogs specifically, look for a locking or screw-down lid and a base that either sits directly on soil or is sealed with a mesh skirt. If you use a tumbler, mount it on a stable frame so it cannot be tipped; a tipped bin spills its contents and rewards the animal, which makes the behavior worse.
Placement is the next lever. A bin pushed against a fence or wall is harder to circle and tip than one standing in open lawn, and a spot away from the door your pet uses to go outside reduces opportunistic visits. Keeping a clear, hard surface or short-mown strip around the bin also removes cover and makes digging at the base obvious. If raccoons or stray cats are the concern rather than your own pet, the same logic applies: they exploit gaps, loose lids, and exposed food, so a tight seal and a stable base do more than any deterrent.
The routine is where most failures happen. Every time food scraps go in, bury them under a layer of browns such as dry leaves, shredded paper, or cardboard, and replace the lid immediately. A bin that smells strongly of kitchen waste will attract animals regardless of how good the hardware is. Avoid adding meat, dairy, oils, or cooked food to an outdoor bin if pets or wildlife have access, since these are the scraps that draw the most attention. Turn or aerate the pile regularly so it breaks down faster and stays less appealing.
For households with a dog that has already learned to raid the bin, physical separation usually settles it faster than training alone: a small fenced enclosure, a bin with a locking lid, or a location the dog cannot reach unsupervised. Cats are more likely to use a bin as a latrine than to raid it, so a snug lid and a base that is not loose soil solve most of that problem. The practical test is simple: if you can open the bin with one hand while it stands firm, so can a clever animal, so choose the model that takes a deliberate action to open and keep the area around it tidy.
Managing Odors, Pests, and Moisture in Any Compost Bin
Odor problems almost always trace back to the same root cause: too much moisture combined with too little oxygen, which pushes a bin toward anaerobic conditions. A healthy compost bin should smell faintly earthy, like a forest floor after rain, never sour or like rotting garbage. If a sharp smell develops, the fix is rarely a chemical additive—it is turning the pile to introduce air and mixing in dry, carbon-rich material such as shredded paper, cardboard, or dry leaves. Aim for a texture that feels like a wrung-out sponge: damp to the touch but not dripping. When you squeeze a handful, only a drop or two should appear.
Pests are attracted by the same things that create odors—exposed food scraps and excess moisture. For home owners, the most effective defense is burial: always cover fresh kitchen scraps with a layer of finished compost or brown material so nothing edible sits on the surface. If rodents or raccoons are a concern, choose a bin with a secure, well-fitted lid and, where relevant, a base that sits flush with the ground or is reinforced against digging. For pet owners dealing with dog or cat waste, keep that material out of a standard compost bin entirely, since conventional home systems are not designed to handle it; instead, manage odors at the source by promptly removing waste from the yard and keeping it away from the compost area.
Moisture management is the lever that controls both odor and pests, so treat it as a routine check rather than an emergency response. In wet seasons, keep the lid closed and add browns generously; in dry, hot weather, the pile may need occasional watering to stay active. Turning the pile regularly restores airflow and lets you spot soggy pockets before they turn foul. A bin placed in partial shade tends to hold moisture more evenly than one baking in full sun, which can dry the edges while leaving the center waterlogged.
Different bin types demand different habits. Sealed tumblers retain moisture well and need less added water but benefit from adding browns with every load of scraps. Open or stationary bins are more exposed to rain and pests, so layering browns on top and keeping a lid on are essential. Worm bins are especially sensitive to excess moisture and strong odors, so drainage and a balanced ratio of bedding to scraps matter more there than anywhere else.
The practical routine that prevents most problems is simple: add scraps in small amounts, always cover them, keep the moisture balanced, and turn regularly. Address small issues early—a faint smell or a few flies—before they escalate, and most compost bins will stay odor-free and pest-resistant through the seasons.
What You Can and Cannot Compost at Home
Knowing what belongs in a compost bin matters as much as choosing the bin itself. The basic rule is simple: composters work best with a mix of nitrogen-rich “greens” and carbon-rich “browns.” Greens include fruit and vegetable scraps, coffee grounds and paper filters, tea leaves and bags (check that the bag is paper, not plastic mesh), fresh grass clippings, and spent flowers. Browns include dried leaves, straw, shredded newspaper and plain cardboard, sawdust from untreated wood, and small twigs. Aim for roughly two to three parts browns to one part greens by volume; if the pile smells sour or slimy, you have too many greens, and adding browns will usually correct it within days.
Pet owners have a specific advantage here, but also a specific caution. Dog and cat waste should not go into a standard home compost bin. It can carry pathogens that a backyard pile rarely gets hot enough to destroy, and it attracts flies and rodents. The same applies to cat litter, including clumping and biodegradable varieties, and to soiled pet bedding. If you want to handle pet waste, look for a dedicated pet-waste digester or a sealed unit designed for that purpose, and keep it entirely separate from the compost you will spread on garden beds.
Several everyday items are commonly composted but should be excluded from a simple bin. Cooked food, meat, fish, bones, dairy, and oily leftovers break down slowly and draw pests; they belong in a sealed bokashi system or a municipal collection, not an open pile. Diseased plant material, weeds that have gone to seed, and anything treated with persistent herbicides should stay out, because home piles rarely reach the temperatures needed to neutralize them. Glossy paper, receipts, and anything laminated should also be avoided.
Size and material matter for what the bin can realistically handle. Small indoor countertop bins are fine for vegetable scraps and coffee grounds but not for grass clippings or woody prunings. Larger outdoor tumblers and stationary bins can take leaves, straw, and shredded cardboard, but thick branches and whole corn cobs will sit for a long time unless chopped down. If you generate a lot of kitchen scraps and little yard waste, a bokashi or worm-based system often suits better than a traditional pile, since it tolerates a higher proportion of food waste.
Finally, match the input to the output you want. If the finished compost will go on vegetable beds, keep the bin free of pet waste, cooked food, and questionable paper. If it is mainly for ornamental beds and lawn topdressing, you have a little more latitude with leaves and grass, but the core rules still apply. Chop or shred bulky items to speed breakdown, keep the material about as damp as a wrung-out sponge, and turn or aerate regularly. A bin fed with the right balance breaks down steadily; one fed with the wrong materials stalls, smells, or attracts animals.
Size, Capacity, and Placement: Matching a Bin to Your Home
Capacity is the first decision most people get wrong, because it is easy to buy a bin that looks generous in a product photo but fills faster than expected in daily use. A small household that cooks mostly from fresh ingredients and scraps only vegetables will generate modest volumes, while a family that cooks every day, peels a lot of fruit, and adds coffee grounds and eggshells will fill a compact bin quickly. As a rule of thumb, choose a bin that matches roughly a week of your kitchen scraps, since a bin that takes a month to fill tends to sit long enough to turn odorous and attract pests. Countertop bins suit small kitchens and single cooks; larger freestanding bins suit households that cook in volume or want to batch scraps before emptying into an outdoor system.
Where the bin will live matters as much as its size. A countertop model needs a footprint small enough to sit beside the prep area without crowding it, and a lid that opens and closes easily with one hand while you are holding a knife or a bowl. Under-sink models trade visibility for floor space and suit kitchens where counter real estate is scarce, but they demand a cabinet tall enough to clear the lid and a clear path to slide the bin in and out. Freestanding bins belong on the floor near the prep zone, ideally on a washable surface, and should be light enough to lift when full.
For homes with pets, placement is a containment problem before it is a convenience one. A bin with a secure, latching lid is worth prioritizing over capacity, because a curious dog or a determined cat will investigate anything that smells of food. Keep the bin off the floor where possible, or choose a model with a weighted base and a lid that does not flip open on contact. A bin placed in a closed cabinet or behind a child-and-pet-resistant door removes the temptation entirely. If the bin must sit on the floor, position it against a wall rather than in an open walkway, where it is less likely to be knocked over.
Outdoor and garage placement changes the calculus. A larger bin kept outside or in a garage can hold more scraps and reduce trips, but it needs a lid that seals against rain and animals, and a location that is convenient enough that you actually use it rather than letting scraps pile up indoors. The path from kitchen to bin should be short and unobstructed, especially in winter or bad weather, or the habit collapses.
Finally, think about the full cycle, not just the bin. The bin’s capacity should align with how often you are willing to empty it and where the contents go next, whether that is an outdoor composter, a municipal collection, or a garden pile. A bin that is slightly smaller than you think you need, emptied on a regular rhythm, usually serves a home better than an oversized one that becomes a storage problem.
Maintenance Habits That Keep Your Compost Bin Working
A compost bin rewards a small, steady routine far more than occasional deep cleaning. The single most useful habit is checking moisture whenever you add material. Squeeze a handful of the mix: it should feel like a wrung-out sponge, damp but not dripping. If it’s soggy, mix in dry browns such as shredded paper, cardboard, or dead leaves; if it’s dusty and crumbly, add fresh greens or a little water and turn the pile. Getting this balance right prevents the sour, anaerobic smell that signals a bin is too wet and starved of air.
Turning is the second habit worth building. For a typical backyard bin, a quick mix every week or two keeps oxygen moving through the material and speeds decomposition noticeably. Tumblers make this easy with a few rotations, while static bins need a fork or aerator pushed down to the base. The payoff is a pile that heats up in the middle and breaks down evenly rather than sitting cold and matted on one side.
Feeding discipline matters just as much. Bury fresh scraps in the center of the pile rather than dumping them on top, and keep a workable ratio of roughly two to three parts browns for every part greens. Chop larger items into smaller pieces so they break down faster, and avoid overloading the bin in a single go. For households with pets, keep pet waste and soiled bedding out of a standard food-scrap bin unless the system is specifically designed for it, and store scraps in a sealed container until you add them so the bin stays pest-free.
Watch for trouble signs and respond early. Fruit flies usually mean exposed food, so covering each addition with browns solves most cases. Rodents point to easy access or fatty, meaty scraps sitting near the surface. Slow decomposition in cool weather is normal, so expect a quieter pile in winter and richer activity once temperatures rise. A quick look at the lid, base, and vents each week catches loose fittings or blocked airflow before they become problems.
Finally, plan for harvest. Once the lower layers turn dark, crumbly, and earthy-smelling, screen out unfinished pieces and return them to the active pile. Empty and rinse the bin between cycles, let it dry, and start fresh. This simple rhythm of checking moisture, turning, feeding carefully, and harvesting on time keeps any bin productive season after season.
Frequently asked questions
Do I need a special bin to compost at home?
No, you do not need a manufactured bin to start composting. A simple heap or a homemade enclosure of pallets or wire mesh can work for yard waste and kitchen scraps. A dedicated bin helps mainly with neatness, pest control, moisture retention, and easier turning. Choose a lidded bin or a tumbler if you want tidier handling, or an open system if you have space and manage it carefully.
Can I compost pet waste in a home compost bin?
Dog and cat waste carries pathogens that a typical backyard bin may not heat enough to destroy, so most home composters avoid putting it in compost destined for vegetable beds. If you want to handle pet waste, use a separate system dedicated only to that material and keep the finished product away from food crops. Never add cat litter, especially clumping or clay types, to a regular compost bin.
How do I stop my dog from getting into the compost bin?
Use a bin with a secure, weighted or locking lid, and place it where the dog cannot easily reach it. Fencing the compost area or setting the bin behind a gate works well. Avoid adding tempting items such as meat, dairy, or oily scraps, and bury fresh kitchen waste in the center of the pile. Keeping the lid closed and latched at all times is the simplest safeguard.
Where should I place an outdoor compost bin?
Put the bin on level, well-drained ground, ideally in partial shade so it does not dry out or overheat in strong sun. Keep it convenient to the kitchen and garden so you actually use it, but away from property lines and neighbors’ windows. Direct contact with soil lets worms and microbes move in. Avoid spots where runoff could reach wells, streams, or vegetable beds.
How often should I turn the compost in a tumbler bin?
Turn a tumbler every few days to a week during active composting, giving it several full rotations each time. Turning adds oxygen, mixes materials, and exposes new surfaces to microbes. If the contents look dry or cool, turn less often and add moisture; if they smell sour or slimy, turn more and add dry browns. Regular turning generally speeds up the process.
Why does my compost bin smell, and how do I fix it?
Smell usually means the pile is too wet, too compacted, or overloaded with nitrogen-rich greens such as food scraps and grass clippings. Fix it by turning the pile to add air and mixing in dry browns like leaves, cardboard, or straw. Keep the lid on to control moisture, and avoid adding meat, dairy, or oils. A healthy pile should smell earthy, not sour or rotten.
Can I compost in an apartment without a yard?
Yes. Use a sealed indoor bin or a worm bin designed for small spaces, and keep it in a kitchen, closet, or balcony. Add fruit and vegetable scraps, coffee grounds, and shredded paper, and avoid meat, dairy, and oily foods to limit odors and pests. Indoor systems need careful moisture control and regular attention, but they produce compost without outdoor space.
How long does it take to get finished compost?
Timing depends on the method, materials, moisture, and how often you turn the pile. A well-managed hot pile or frequently turned tumbler can finish in a few months, while a cool, untended heap may take much longer. Finished compost is dark, crumbly, and smells earthy, with little recognizable original material. Check readiness by texture and smell rather than a fixed calendar.
Read next :Dog Food for Dogs with Pancreatitis: A Buyer’s Guide · Dining Table Height: A Complete Guide to Choosing the Right Size · Bed Covers for Dogs: Protect Your Bed and Keep Your Dog Comfortable · Best Lawn Mower: A Complete Buying Guide for Homeowners · Compostable Food Waste Bags: A Practical Buying Guide
Work out your own case in 30 seconds:
Methodology
This calculator produces an indicative estimate based on the parameters you enter. The ranges used reflect typical market tiers in the eco and energy savings space and are neither a commercial offer nor a guarantee. Prices and availability may vary.
Read next :Best Lawn Mowers 2026: A Complete Buying Guide
Full guide :Sustainable Home
More from this guide :
Was this guide helpful?
Share your experience with the WiseHomeGuides community.