
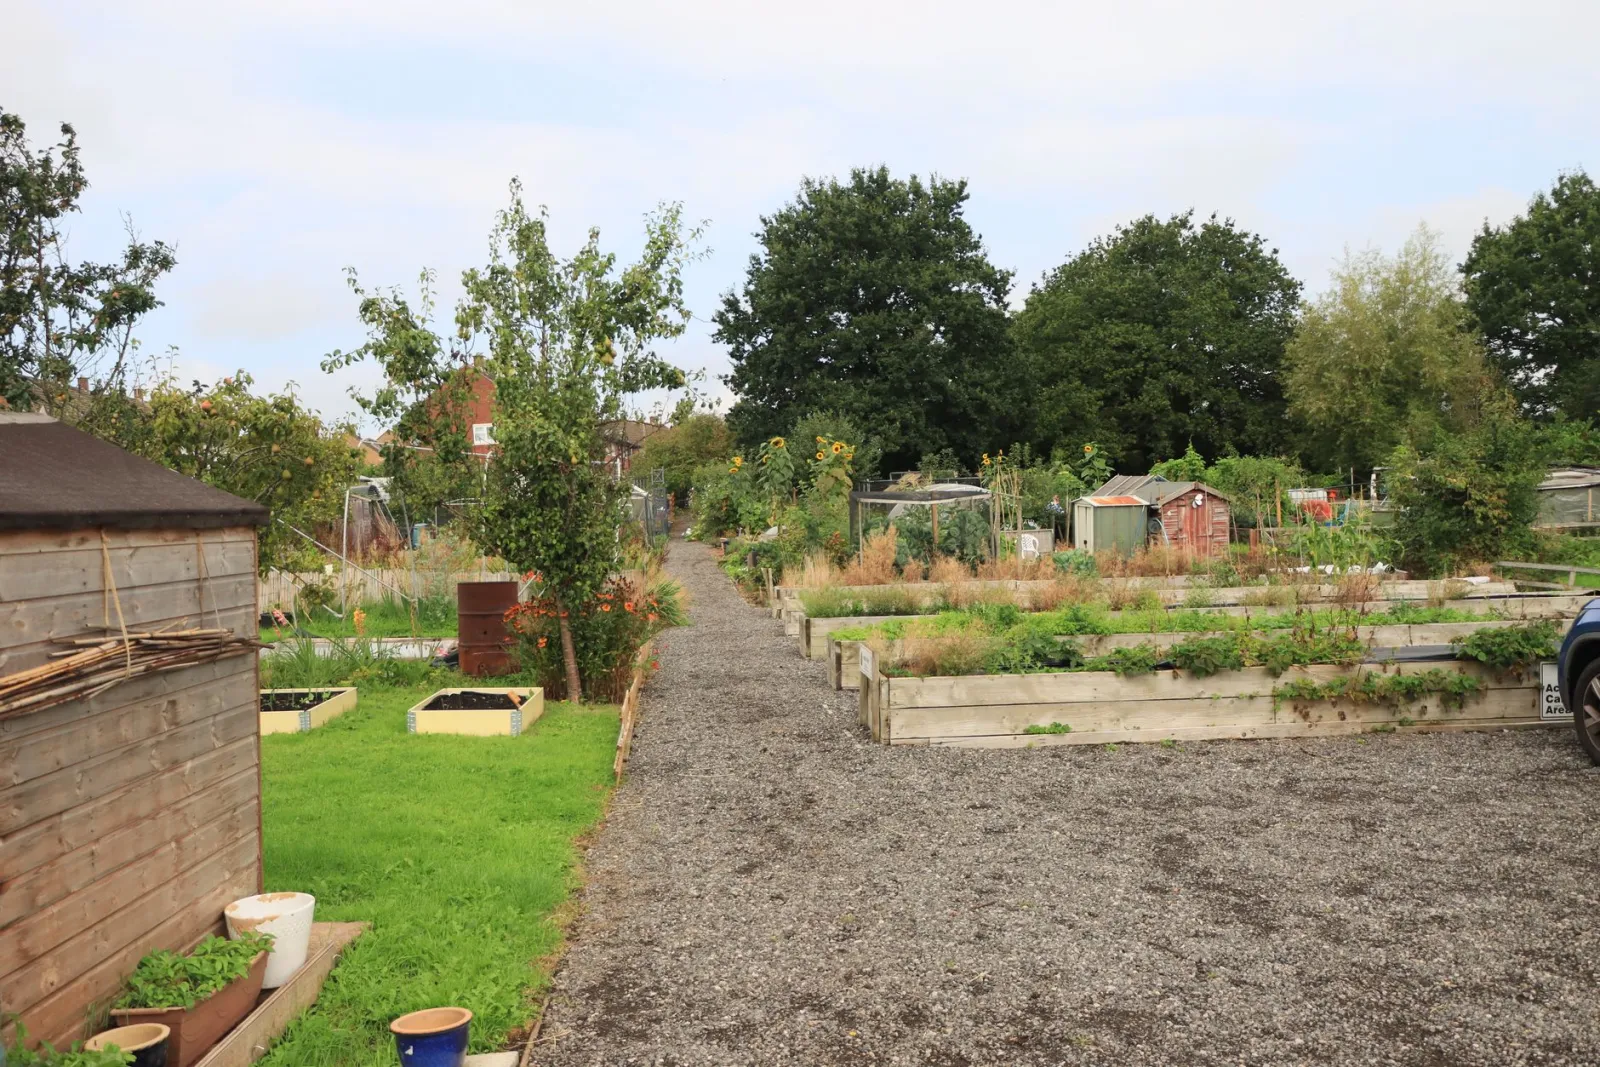
Short answer : Raised beds for gardening are freestanding planting boxes filled with a soil mix and built above ground level, which gives you control over soil quality, drainage, and access. Planning starts with siting the beds for adequate sun, choosing a height and width that suit the gardener, and selecting a durable material for the frame. From there you fill the beds with a balanced soil blend, plant intensively in the improved medium, and manage watering and feeding through the season. Because the soil is contained and never walked on, it stays loose, warms earlier in spring, and supports closer spacing than in-ground rows.
In short
- Site beds where they receive full sun and are reachable from every side without stepping into the soil.
- Keep bed width to roughly an arm’s reach so you can work the middle from either edge.
- Choose rot-resistant frame materials and line the interior where needed to protect the wood.
- Fill with a mix of topsoil and compost rather than garden soil alone to avoid compaction and weeds.
- Plan paths and irrigation before building, since moving filled beds later is difficult.
What Are Raised Beds and Why Use Them
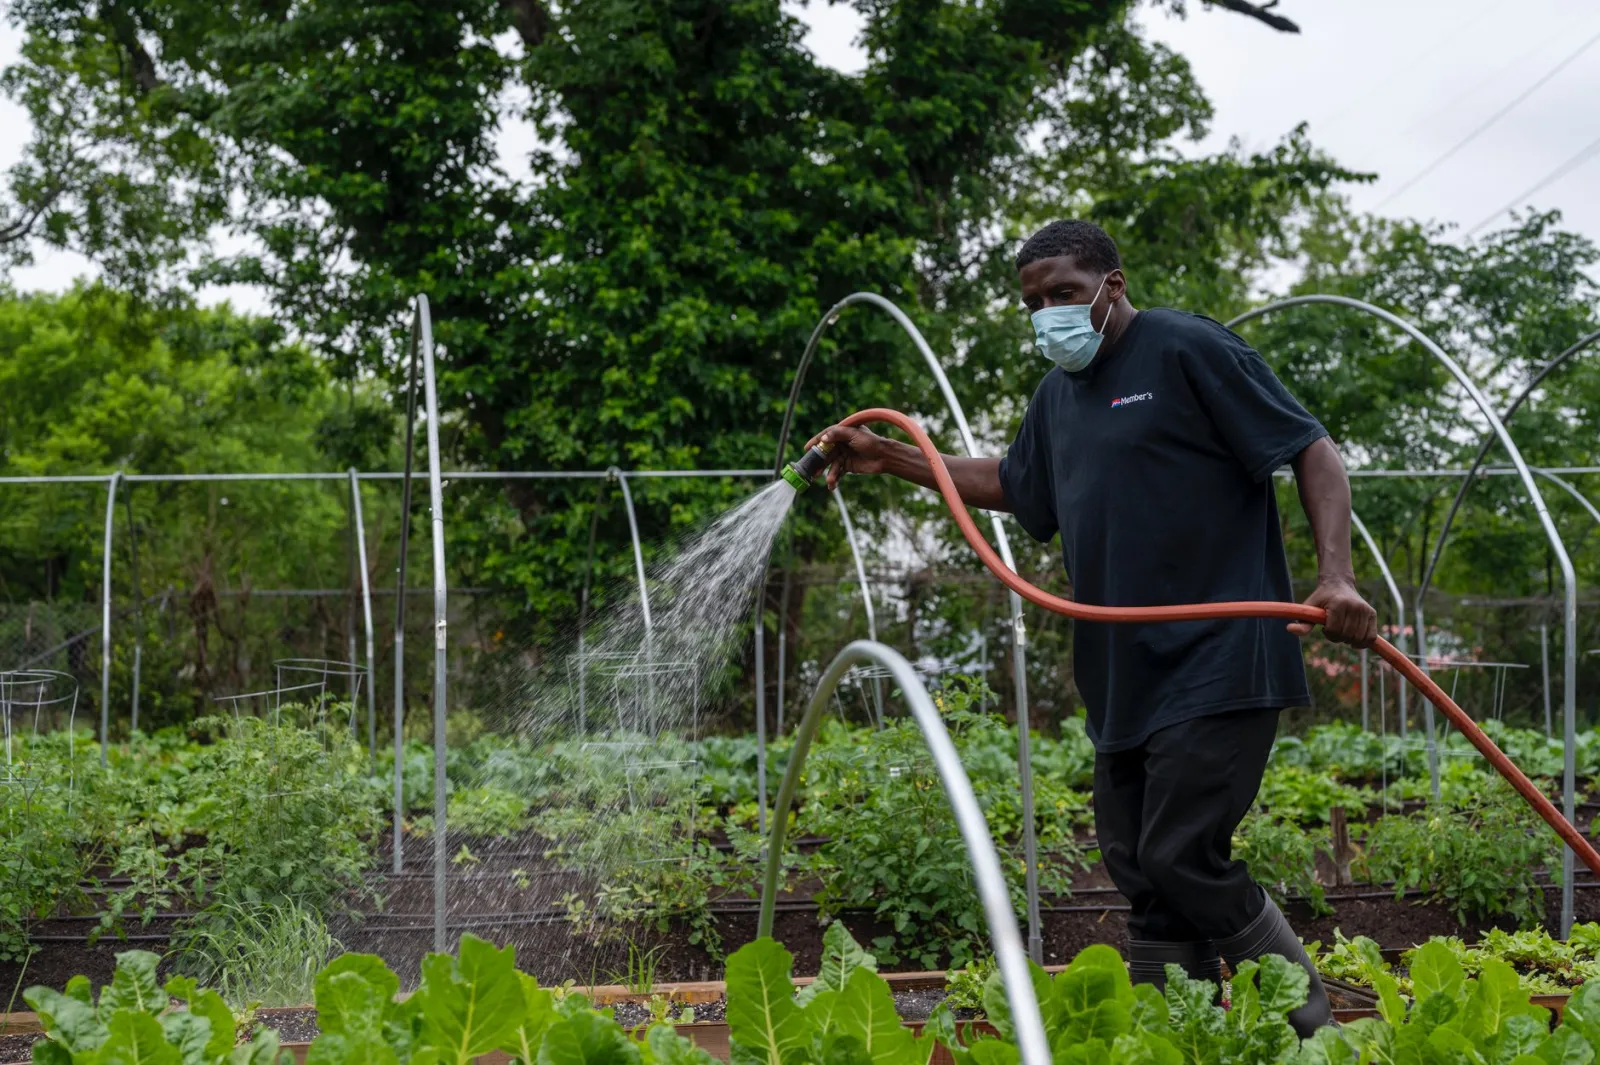
A raised bed is simply a planting area built on top of the existing ground and enclosed by a frame, usually made of wood, so that the soil inside sits higher than the surrounding grade. The frame holds a defined volume of soil that you choose and control, rather than whatever happens to be in your yard. Beds are commonly built waist- or knee-high for easy access, but even a shallow frame a few inches tall qualifies, and the depth you pick determines what you can grow: shallow beds suit salads, herbs, and low greens, while deeper beds are needed for carrots, parsnips, and other long-rooted crops. Width matters too, because you need to reach the middle from either side without stepping on the soil, so beds are typically kept narrow enough to tend from the edges.
The main reason gardeners choose raised beds is control over soil. Instead of fighting compacted, stony, or poorly draining ground, you fill the frame with a blend you select, which gives roots a loose, workable medium and makes watering and feeding more predictable. Because the soil sits above grade, it also warms earlier in spring and drains more freely, which helps in cold or heavy-clay gardens and in wet seasons when waterlogged ground stalls growth. The flip side is that raised soil dries out faster in summer, so beds usually need more consistent watering than open ground.
Accessibility and ergonomics are another practical argument. Raising the growing surface reduces bending and kneeling, which matters for gardeners with back or knee limitations, and it keeps the working area clean and defined. A framed bed also separates paths from growing space, so you can walk around the bed rather than across it, and the soil stays uncompacted. That structure makes crop rotation, mulching, and weeding easier to manage in a small, organized footprint.
Raised beds also extend the growing season and the range of what is possible. A frame can be fitted with hoops and covers to protect crops from frost or pests, and the elevated soil responds faster to both warming and covering. They work well on awkward sites: sloping ground, thin soil over rock, patios and courtyards where a bed can sit on a hard surface, and rented gardens where you want a defined, movable growing area. They are also a good fit for small plots where intensive planting in a contained space gives more harvest per square foot than sprawling rows.
Finally, raised beds suit different gardeners for different reasons. Beginners benefit from a contained, manageable area with clear boundaries. Kitchen gardeners like the proximity to the house and the tidy structure. Community and school plots gain from defined, shared spaces that are easy to allocate and maintain. The trade-offs are real: beds cost more to fill and build than digging a patch, they need regular watering, and the frame itself requires occasional upkeep. Knowing these trade-offs up front helps you decide whether raised beds are the right approach for your site and how you garden.
Choosing the Right Size and Height for Your Raised Beds
Size and height are the two decisions that shape almost everything else about a raised bed, from how much soil you must haul in to how comfortably you can work. Start with width, because it determines whether you can actually reach your plants. A bed should be narrow enough that you can stand at the edge and reach the center without stepping onto the soil, since walking on a raised bed compacts it and undoes the point of building one. For most gardeners that means a width of roughly four feet, which lets you reach in from both sides. If a bed sits against a wall or fence and is only accessible from one side, keep it narrower so the far edge stays within arm’s reach.
Length is far more flexible. A long bed along a fence line uses space efficiently, but past a certain point the middle becomes awkward to cross, so many gardeners break long runs into separate beds with paths between them. Those paths matter as much as the beds themselves: leave enough room to kneel, wheel a barrow, and move a hose without trampling crops. A layout of several modest beds with generous paths usually beats one oversized bed that is hard to navigate.
Height deserves the most thought, because it trades soil volume and cost against ergonomics. A shallow bed of six to eight inches suits shallow-rooted crops like lettuce, herbs, and radishes, and it is the cheapest to fill. Root vegetables and larger plants such as tomatoes or brassicas want more depth, generally in the range of ten to twelve inches, so their roots have room and the soil does not dry out too quickly. Deeper beds hold moisture and temperature more steadily, which helps in hot, exposed sites.
The other reason to go taller is comfort. A bed raised to roughly knee or waist height reduces bending and kneeling, which makes gardening far easier for anyone with back or joint concerns or who simply prefers to work standing. Very tall beds, however, demand a large volume of soil and a sturdy frame, and they can dry out differently from ground-level beds. A common compromise is a bed of moderate height for most crops, with one or two taller beds reserved for intensive use or for gardeners who need the ergonomic benefit.
Finally, match size and height to what you plan to grow and how you will tend it. Salad and herb beds can stay low and wide; beds for sprawling plants or deep-rooted vegetables benefit from more depth and a footprint that gives each plant room. Consider your access to water and soil, your physical reach, and the tools you use, then choose dimensions you can fill affordably and maintain comfortably season after season.
Best Materials for Raised Bed Construction
Wood remains the most common choice for raised bed construction, and for good reason: it is workable with basic tools, widely available, and forgiving of small mistakes. The key decision is species and treatment rather than board dimensions. Naturally rot-resistant woods such as cedar and larch hold up well in contact with soil and moisture without chemical treatment, which makes them a sensible default for beds growing edible crops. Untreated pine is cheaper and easier to source but breaks down noticeably faster in damp conditions, so it suits gardeners who accept periodic rebuilds or who line the interior with a durable barrier. Avoid salvaged timber of unknown origin, particularly old railway sleepers or painted boards, since contaminants can leach into the soil over time.
Pressure-treated lumber is durable and affordable, but its suitability depends on the treatment chemistry and your comfort level with it. Modern treatments differ substantially from older formulations, and opinions on food safety vary. A practical compromise many gardeners use is to choose a treated frame for the outer structure while keeping untreated or naturally rot-resistant boards on the inner face that touches the soil, or to line the inside with a heavy-duty membrane. Whatever wood you select, thicker boards resist bowing under the weight of wet soil far better than thin ones, and bracing across the middle of long beds prevents the sides from splaying outward.
Masonry and concrete block offer near-permanent structure and excellent thermal mass, which can moderate soil temperature swings and benefit heat-loving crops in cooler climates. The trade-offs are cost, effort, and immobility: a block bed is effectively a fixed installation, so plan its position carefully. Concrete should be fully cured before filling, and some gardeners prefer to line the inner faces to separate the soil from the block surface. Brick follows similar logic with a more traditional appearance, though mortar joints require sound workmanship to withstand years of frost and moisture.
Metal beds, typically galvanized steel or powder-coated panels, have become popular for their clean look, long lifespan, and quick assembly. They heat up faster in spring than wood, which can be an advantage or a drawback depending on your climate and crops. When choosing metal, confirm that any coating is intended for soil contact and check edges for sharpness, since thin panels can be uncomfortable to handle. Stone and rock beds suit sloped sites and naturalistic gardens, but they are labor-intensive to build and difficult to move.
Whichever material you choose, a few construction details matter as much as the material itself. Joints should be fastened securely so the frame holds its shape when filled, and the bed should sit level so water distributes evenly. Consider how the material ages: wood weathers and can be refreshed, metal may scratch, and masonry may need repointing. Matching the material to your budget, climate, and how permanently you want the bed in place will serve you better than chasing a single “best” option.
How to Prepare the Ground and Install Raised Beds
Preparing the ground is the step most gardeners rush, yet it determines how well a raised bed performs for years. Start by clearing the footprint of turf, weeds, and debris, then check what lies beneath. A bed placed over compacted subsoil or construction rubble will drain poorly and stunt roots, so loosen the native soil across the entire footprint with a fork to roughly the depth of a spade before any frame goes down. If the ground is heavy clay that holds water, fork in coarse organic matter or grit to improve drainage rather than relying on the bed’s height alone to solve the problem.
Leveling matters more than it seems. Set the frame on ground that is roughly level so the sides sit flush and the structure does not rock or twist as the soil settles. On a gentle slope, you can either cut the high side into the ground or step the bed down the incline in tiers; a bed that is visibly out of level will show uneven moisture, with the low corner staying wet. For most garden soils, a frame seated directly on the ground with its base slightly dug in is more stable than one resting on the surface, and it closes the gap where weeds and pests can enter.
Choose the placement with sun and access in mind before you commit. Most vegetables and herbs want a full day of light, so keep beds away from the shade of fences, buildings, and mature trees, whose roots also compete for water and nutrients. Leave enough room between beds for a wheelbarrow and for you to kneel and reach the center comfortably; a bed wider than you can reach from both sides becomes awkward to plant and harvest. Group beds so that paths run logically and so taller crops do not shade shorter ones.
Line the base only if you have a reason to. A layer of cardboard over cleared turf suppresses regrowth organically as it breaks down, while hardware cloth laid under the frame deters burrowing animals in areas where that is a concern. Avoid solid bottoms, which trap water and cut the bed off from soil life. If the native ground is poor, you can loosen it and mix in compost at the base so roots can bridge from the bed into the earth below.
Finally, fill and settle before planting. Use a mix of topsoil and compost suited to what you intend to grow, leaving a couple of inches of freeboard below the rim so water and mulch stay contained. Water the filled bed thoroughly and let it settle, topping up any low spots, then wait for the soil to drain before setting out plants. A well-prepared base and a level, well-placed frame give the bed a head start that pays off season after season.
Soil Mix and Filling Your Raised Beds
Filling a raised bed is the most expensive single step in the whole project, so it pays to think in layers rather than treating the bed as one giant container of purchased topsoil. A practical approach is to fill the lower third with coarse organic material that will slowly break down and feed the soil above: rough compost, aged manure, straw, shredded leaves, or partially rotted wood chips. This core layer improves drainage at the base, reduces the volume of costly material you need to buy, and settles over time into a richer medium. Avoid burying fresh, uncomposted material directly beneath the root zone of young transplants, since it can tie up nitrogen as it decomposes.
The upper portion, where roots actually do most of their work, should be a balanced, friable mix rather than straight garden soil or pure compost. A common and reliable ratio is roughly equal parts topsoil or loam, compost, and a drainage component such as coarse sand, fine bark, or perlite, adjusted to your climate and what you are growing. Root vegetables and herbs generally prefer a looser, sandier blend, while leafy greens and heavy feeders tolerate a richer, compost-dominant mix. Straight native soil alone tends to compact and drain poorly in a raised bed, while pure compost can shrink dramatically and hold too much moisture.
Before filling, confirm what is already beneath the bed. If you are placing it over existing lawn or compacted ground, break up the surface and consider a layer of cardboard to suppress weeds; if the base is open to native soil, worms and roots will migrate upward and effectively extend your growing depth. Beds with a solid bottom or sitting on concrete behave like large containers and need a mix with sharper drainage and more consistent watering. Line the sides with cardboard or untreated material only if you want to slow soil loss through gaps.
Fill in stages and water each layer as you go, which helps settle the mix and prevents large air pockets that later cause the bed to drop. Expect the level to fall noticeably over the first season as organic matter decomposes; plan to top-dress annually with a few centimeters of compost rather than filling to the brim at the start. Leave a small gap below the rim so mulch and water stay in place. Topping up each year keeps the bed productive and gradually builds a deep, workable root zone without a single large outlay.
Planning Crop Layout in Raised Beds
Planning the crop layout is where a raised bed’s advantages become practical. Because the soil is contained and the surface is reachable from the sides, you can organize plantings by how much space each crop needs and how often you will walk among them. A useful starting point is to divide the bed into zones by plant size: taller, longer-season crops toward the back or center, lower and quicker crops along the edges where they are easy to reach and won’t be shaded. This simple arrangement reduces competition for light and keeps harvest paths clear.
Spacing decisions should follow the mature size of each plant rather than the size of the seedling you set out. Transplants look sparse at first, but crowding them leads to poor airflow, more disease pressure, and smaller yields. A common approach is to group crops by their growth habit: sprawling plants that need room to spread, upright plants that can be set more closely, and root crops that occupy the soil below the surface while leafy crops fill the space above. Thinking in three dimensions—height, spread, and rooting depth—lets you fit more into the same footprint without overcrowding.
Succession planting keeps a raised bed productive across the season. Rather than filling the whole bed at once, reserve a portion for quick crops that finish early, then replant that space with a warm-season crop once it is cleared. Pair fast-maturing leafy crops with slower, larger plants so the quick crop is harvested before the slower one needs the room. This staggering also spreads your harvest over a longer window instead of a single glut.
Companion grouping is worth considering, but keep it practical. Group plants with similar water and light needs together so you can irrigate and site them consistently. Tall crops can shade shorter neighbors, so place them where that shade falls on heat-sensitive plants rather than on sun-lovers. Avoid mixing vigorous spreaders with delicate crops that would be overwhelmed. Rotation matters too: avoid growing the same crop family in the same spot season after season, and shift heavy feeders to a freshly amended section of the bed.
Finally, plan for access. Leave enough unplanted space or stepping room to reach the center of the bed without compacting the soil, and orient rows or blocks so you can harvest and inspect plants easily. A layout sketched on paper before planting—marking where each crop goes, its spacing, and its expected finish time—saves replanting later and makes succession and rotation straightforward to manage.
Watering and Irrigation for Raised Beds
Raised beds dry out faster than in-ground plots, and that single fact shapes every watering decision you make. Because the soil sits above grade and is exposed to air on all four sides, water drains freely downward and evaporates from the sides as well as the surface. A bed that is two feet tall loses moisture more quickly than one built close to the ground, and a bed in full sun with wind exposure dries faster still. The practical consequence is that you will water more often than you would a comparable ground plot, but each watering can be lighter, since you are not trying to soak a deep native subsoil. Plan on checking moisture more frequently during hot, breezy weather and less often in cool, humid spells.
The right irrigation method depends on how many beds you tend and how much time you can give them. Hand watering with a can or hose is fine for one or two beds near a spigot, and it lets you look closely at plants while you work. Once you are managing several beds, drip lines and soaker hoses earn their place: they deliver water slowly at the soil line, keep foliage dry, and reduce evaporation loss compared with overhead sprinkling. Overhead watering is the least efficient option for raised beds because much of the spray lands between plants or blows away, and wet leaves invite fungal problems. A simple timer on a drip system removes the guesswork for busy households.
Whatever the delivery method, water deeply enough that moisture reaches the root zone rather than just dampening the surface. In a raised bed the rooting depth is limited by the bed itself, so a thorough soak that penetrates most of the soil profile encourages roots to grow downward instead of lingering near the surface. Shallow daily sprinkling produces weak, surface-rooted plants that suffer quickly in heat. Water in the morning when you can, so foliage dries before evening and the soil has time to absorb moisture before the heat of the day.
Soil and mulch do as much work as any irrigation hardware. A loamy, compost-rich mix holds water far better than a sandy blend, and a layer of mulch over the soil surface slows evaporation and keeps the top layer from crusting. Mulching is especially valuable in tall beds fully exposed to sun and wind. Grouping plants with similar water needs within a bed also helps, so you are not overwatering drought-tolerant herbs to keep thirsty greens happy. Check moisture by pushing a finger or a trowel into the soil below the mulch; if it is dry at that depth, it is time to water regardless of what the surface looks like.
Finally, match your system to your routine and to the season. Newly planted beds and seedlings need gentler, more frequent attention than established plants with deeper roots. In peak summer, beds may need water every few days; in spring and fall, weekly soaking is often enough. If you travel, a drip system on a timer or a soaker hose connected to a faucet timer keeps beds alive far more reliably than asking a neighbor to guess. The goal is steady, deep moisture without waterlogging, and a setup you will actually keep up with.
Weed Control and Maintenance in Raised Beds
Weed pressure in a raised bed is usually lower than in open ground, but that advantage only holds if you plan for it. The most effective control is the bed’s own geometry: a defined frame with a clean edge lets you run a hoe or a string trimmer along the outside without damaging plants, and it keeps lawn grasses and creeping weeds from sliding in sideways. Where beds sit on soil rather than on a hard surface, a barrier at the base matters. Cardboard or several layers of newspaper laid under the fill will smother existing turf and break down over a season, while a woven landscape fabric does the same job more durably but can shed and complicate later soil work. Leave the barrier out entirely if you want worms and deeper roots to move freely between bed and ground, and accept that deep-rooted perennials will need pulling rather than smothering.
Inside the bed, the fill mix itself is a weed decision. Topsoil blends frequently carry weed seed and root fragments; a mix built largely from compost and aged organic matter tends to arrive cleaner, though no material is sterile. Whatever the source, the first season will reveal what came with it, and prompt removal before anything sets seed is what keeps a small problem from becoming a permanent seed bank. A sharp hoe worked on a dry, sunny morning kills seedling weeds quickly, and a shallow stir of the top inch or two of soil is enough—deep cultivation brings buried seed to the surface and triggers a fresh flush.
Mulch is the workhorse of maintenance in raised beds. Two to three inches of straw, shredded leaves, or compost around established plants suppresses most annual weeds, conserves moisture, and keeps soil from splashing onto foliage during watering. Keep mulch a little clear of stems and crowns so they don’t stay wet, and top it up through the season as it settles. In beds where you direct-sow, hold back the mulch until seedlings are tall enough to survive being surrounded, then mulch the gaps.
Perennial weeds—bindweed, ground elder, thistle—need a different approach. Hand-pulling works only if you follow the root, and repeated cutting of top growth through the season steadily weakens the underground reserves. In a raised bed you have an advantage: the contained volume means you can dig out a patch thoroughly without chasing roots across a whole garden. For beds that become badly infested, a season of dense cover with a smothering crop or a heavy mulch layer can reset the bed before replanting.
Maintenance beyond weeding keeps the structure sound and the soil productive. Check the frame each season for loose boards or failing joints, and refresh the mulch and compost top-dressing so the soil level doesn’t sink below the rim. A quick pass with a hoe every week or two during the growing season takes minutes and prevents the backlog that turns weeding into a chore.
Season Extension with Raised Beds
Raised beds change the temperature profile of the soil, and that difference is what makes season extension practical rather than theoretical. Because the bed sits above the surrounding ground, its soil warms earlier in spring and drains faster after rain, so you can often sow or transplant sooner than in an in-ground plot that is still cold and waterlogged. The effect is most pronounced in beds with a good depth of soil and a free-draining mix, and least noticeable in shallow beds sitting directly on compacted subsoil. Treat the advantage as a head start of a few weeks in spring and a similar cushion in autumn, not as a way to ignore your local frost dates.
The simplest layer of protection is a low hoop or frame draped with row cover, fleece, or clear plastic. Row cover is the workhorse: it traps a modest amount of warmth, buffers light frost, and keeps insects off young crops without needing to be opened daily. Clear plastic or rigid covers such as cold frames and cloches capture more heat but require venting on sunny days, because a closed bed can overheat quickly even in cool weather. The practical rule is that the more airtight and transparent the cover, the more attention it demands.
Timing and crop choice matter more than the hardware. Use covers to bridge the gap at the start and end of the season rather than to grow summer crops through winter. Hardy salad leaves, spinach, kale, carrots left in the ground, and overwintering alliums are the natural candidates for extended harvest, while tender crops like tomatoes and peppers benefit mainly from an earlier start in spring. A useful pattern is to cover a bed in late winter to dry and warm the soil before sowing, then remove or vent covers once seedlings are established and the weather settles.
Soil moisture needs watching under any cover. Covered beds shed rain, so the soil can dry out surprisingly fast even in cool weather, and you may need to water by hand. Ventilation also controls humidity, which reduces mould and damping-off in dense seedling crops. On warm days, open or lift covers in the morning and close them again in the afternoon before temperatures drop, and anchor everything firmly against wind, since a loose cover flapping in a gale damages plants and tears quickly.
Finally, match the structure to your climate and commitment. In mild areas, row cover on hoops may be all you need. In colder or windier regions, rigid frames, thicker covers, or a layer of mulch around the bed edges will hold more warmth and protect roots. Decide how much daily management you will realistically do, because season extension works through consistent small adjustments rather than one permanent installation.
Common Mistakes to Avoid with Raised Beds
The most common raised bed mistake is making the bed too wide to reach the middle comfortably. A bed that is too deep front-to-back forces you to step into the soil, which compacts it and defeats one of the main advantages of a raised system. A width that lets you reach the center from either side without straining is the practical target; if you cannot comfortably touch the middle from both edges, the bed is too wide. Long, narrow beds also tend to be more usable than square ones, because you can work along the length without ever overreaching.
Skipping or undersizing the drainage layer is another frequent error. Raised beds drain faster than ground beds by design, but if the base is poorly prepared or the soil sits directly on a compacted, poorly draining surface, water can pool at the bottom and leave roots sitting in saturated soil. On heavy clay ground, loosening the subsoil beneath the bed and adding a coarse drainage layer before filling makes a noticeable difference. Conversely, in very free-draining, sandy situations, a bed that drains too fast can dry out quickly, so matching the fill and base to your ground conditions matters more than following a single recipe.
Using the wrong soil mix is a mistake that shows up slowly. Filling a bed with ordinary garden soil alone often leads to compaction and poor aeration, while filling it entirely with lightweight potting mix can dry out too fast and settle unevenly. A blend that holds moisture but still drains, with enough organic matter to support structure, tends to perform best. Overfilling is equally common: leaving the soil surface well below the rim gives room for mulch and watering without spillover, and it prevents soil washing out during heavy rain.
Neglecting support and access is easy to overlook. Beds built from thin or untreated material can bow outward under the weight of wet soil, so bracing the sides or choosing adequately sturdy construction matters. Placing beds too far from a water source turns routine watering into a chore, and leaving no path between beds means you will walk on the edges and compact the surrounding ground. A little planning for hose reach, wheelbarrow access, and standing room pays off every season.
Finally, treating a raised bed as a one-time build rather than a system to maintain is a common trap. Soil settles over time and needs topping up, organic matter breaks down and must be replenished, and crop rotation within the bed prevents the same pests and nutrient demands from building up year after year. Beds that are planted in the same spot with the same crops season after season gradually lose vigor. Planning rotation, refreshing the soil, and checking the structure each year keeps a raised bed productive far longer than treating it as a permanent, self-sustaining box.
Frequently asked questions
What is the ideal depth for a raised garden bed?
Depth depends on what you plan to grow. Shallow-rooted crops like lettuce, herbs, and radishes do well in a bed around six to eight inches deep. Deeper-rooted vegetables such as tomatoes, carrots, and peppers benefit from ten to twelve inches or more. If the bed sits directly on native soil and drainage is good, roots can extend below the frame, so a shallower bed may still work. For beds on hard surfaces like concrete, choose greater depth to give roots enough room.
Do raised beds need a bottom or liner?
Most raised beds placed on soil do not need a solid bottom. Leaving the base open lets earthworms and soil life move freely and allows excess water to drain. A liner is useful mainly to separate the bed from the ground: hardware cloth discourages burrowing animals, while landscape fabric can slow weeds creeping up from below. Avoid plastic sheeting or other impermeable materials, which trap water and cause waterlogging. Beds on patios or rooftops need a drainage layer and, often, a permeable barrier.
What is the best soil mix for raised beds?
A common approach is a blend of topsoil, compost, and a lighter material such as aged manure or leaf mold to improve structure and drainage. Compost supplies nutrients and supports soil life, while topsoil gives body and water-holding capacity. Avoid filling beds entirely with heavy native clay, which compacts and drains poorly, or with pure compost, which can shrink and become overly rich. Test the mix by squeezing it: it should crumble rather than form a sticky ball. Top-dress with compost each season.
How do I prevent weeds in raised beds?
Start with clean fill: quality topsoil and well-finished compost contain far fewer weed seeds than raw soil or manure. Mulch the surface with straw, leaves, or wood chips to block light and smother seedlings. Remove weeds while young, before they set seed, and pull them roots and all. A permeable landscape fabric beneath the soil can help where persistent weeds push up from the ground. Keep bed edges tidy, and avoid letting weeds grow along the frame where seeds can blow in.
Can I use treated lumber for raised beds?
Modern pressure-treated lumber is widely used for raised beds, and many gardeners accept it for vegetable growing. Older treated wood contained preservatives that are no longer used, so avoid salvaged or reclaimed timber of unknown age. If you prefer to avoid treated wood entirely, choose naturally rot-resistant species such as cedar or locust, or use untreated lumber with the understanding that it will break down sooner. Line the inside with a food-safe barrier if you want extra separation between wood and soil.
How often should I water plants in raised beds?
Raised beds warm and drain faster than ground soil, so they usually need more frequent watering. Rather than following a fixed schedule, check the soil a few inches down and water when it feels dry. Deep, thorough watering encourages roots to grow downward, while light daily sprinkling keeps moisture shallow. Water early in the day to reduce evaporation and leaf wetness. Mulching the surface slows moisture loss, and drip irrigation or soaker hoses deliver water efficiently to the root zone.
What crops are best suited for raised beds?
Raised beds suit almost any vegetable, herb, or flower, but they excel for crops that need good drainage and warm soil. Salad greens, herbs, radishes, and bush beans grow quickly in shallow beds, while tomatoes, peppers, cucumbers, and squash thrive in deeper ones. Root crops like carrots and beets do well in loose, stone-free fill. Because beds are easy to reach, they are also ideal for intensive planting and succession sowing of fast crops throughout the season.
How do I protect raised beds in winter?
In cold climates, protect soil structure and soil life over winter. Clear spent crops and remove diseased foliage, then spread a layer of compost, leaves, or straw as mulch to insulate the surface and prevent erosion. Avoid digging or walking on wet, frozen soil, which damages structure. In very cold regions, insulate the sides of the bed or wrap them to reduce freeze-thaw stress on the frame. Empty or cover containers and ensure drainage so water does not sit and expand.
Read next :Compostable Food Waste Bags: A Practical Buying Guide · Best Lawn Mower Robot: A Complete Buying Guide for Homeowners · Lawn Mower Service Near Me: A Homeowner’s Guide to Finding Local Care · Best Dog Walks Near Me: A Home and Pet Guide · What duvet cover size do I need? 140×200 or 240×220 compared
Put it into practice : How do I build and plant raised garden beds?
Work out your own case in 30 seconds:
Methodology
This calculator produces an indicative estimate based on the parameters you enter. The ranges used reflect typical market tiers in the gardening space and are neither a commercial offer nor a guarantee. Prices and availability may vary.
Read next :Dining Table Height: A Complete Guide to Choosing the Right Size
Read next :Dog Food for Dogs with Pancreatitis: A Buyer’s Guide
Full guide :Garden & Balcony
More from this guide :
Was this guide helpful?
Share your experience with the WiseHomeGuides community.