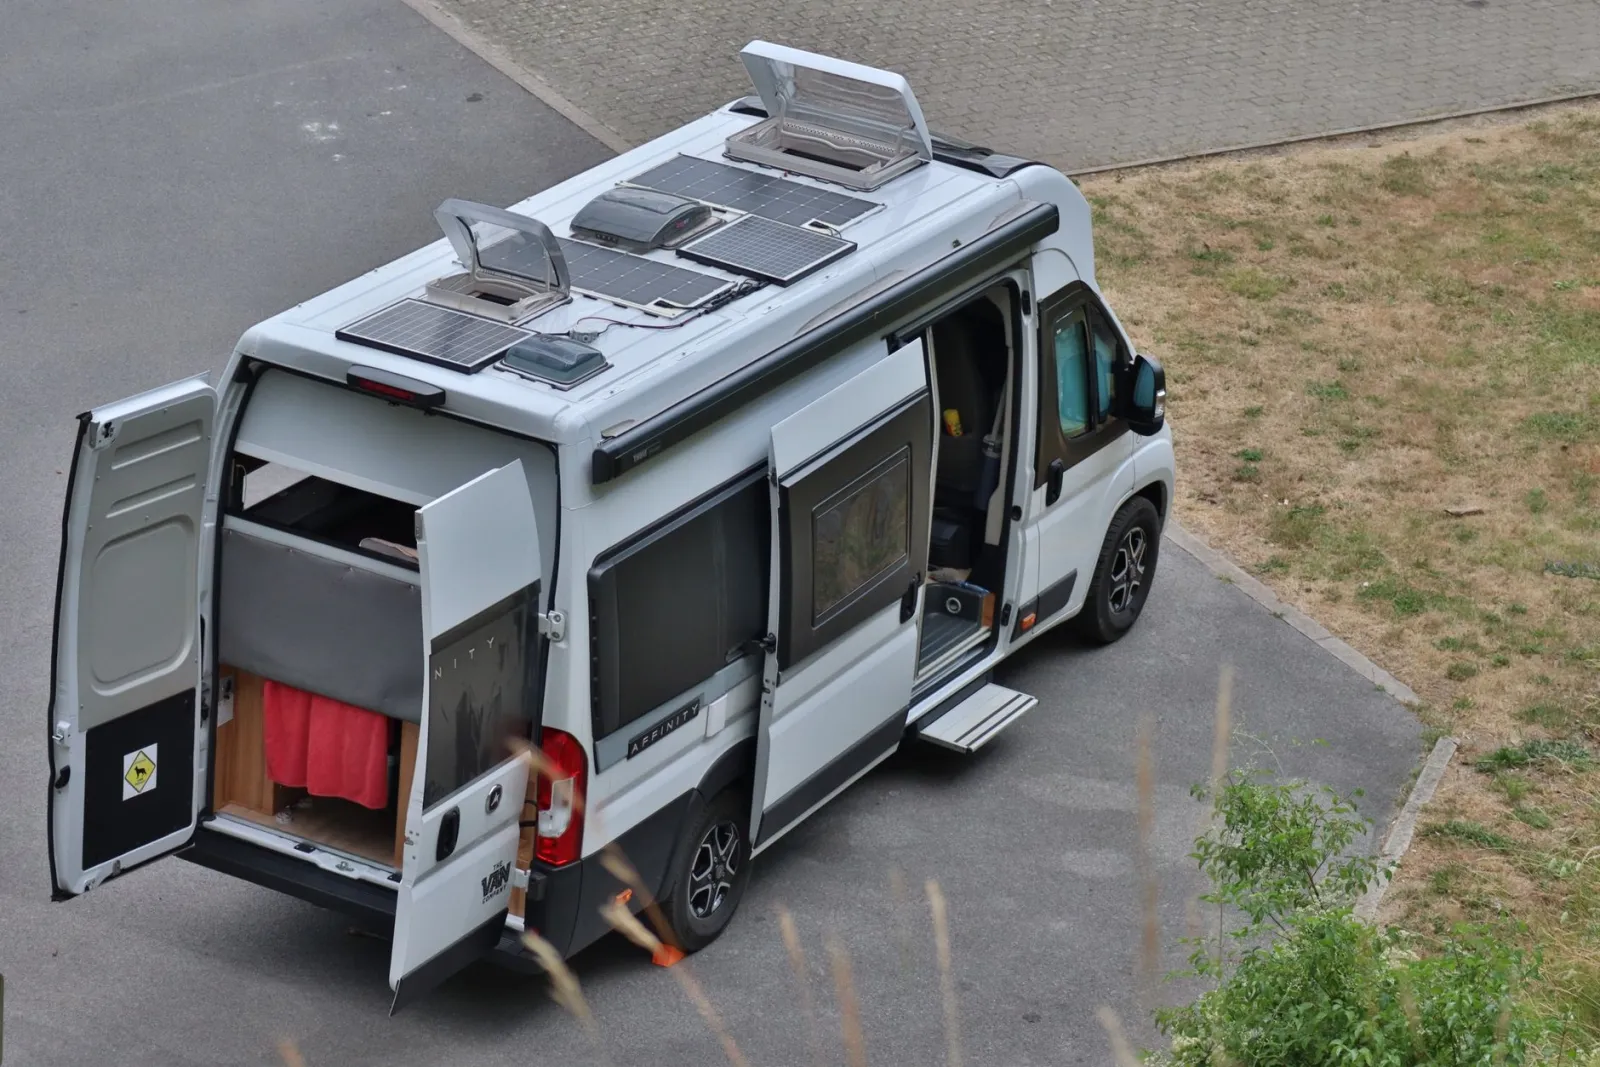
Short answer : Choosing solar panels for a campervan means matching panel output to your real daily power use, then sizing the battery bank and charge controller around that figure rather than buying the biggest panel that fits the roof. Flexible panels suit curved or low roofs, while rigid framed panels last longer and shed heat better but add height and weight. Work out your loads first, allow headroom for cloudy days and panel shading, and plan the wiring, fusing and mounting before you drill anything.
In short
- Calculate daily watt-hours from your fridge, lights, pump and devices before choosing panel wattage.
- Flexible panels bond to curved roofs but run hotter and usually have shorter working lives.
- Rigid framed panels cost less per watt and tolerate heat better but need solid mounting rails.
- An MPPT charge controller harvests more from a given panel than a basic PWM controller.
- Shade from roof vents, aerials or trees cuts output sharply, so plan panel placement carefully.
Why Solar Power Suits Campervan Life
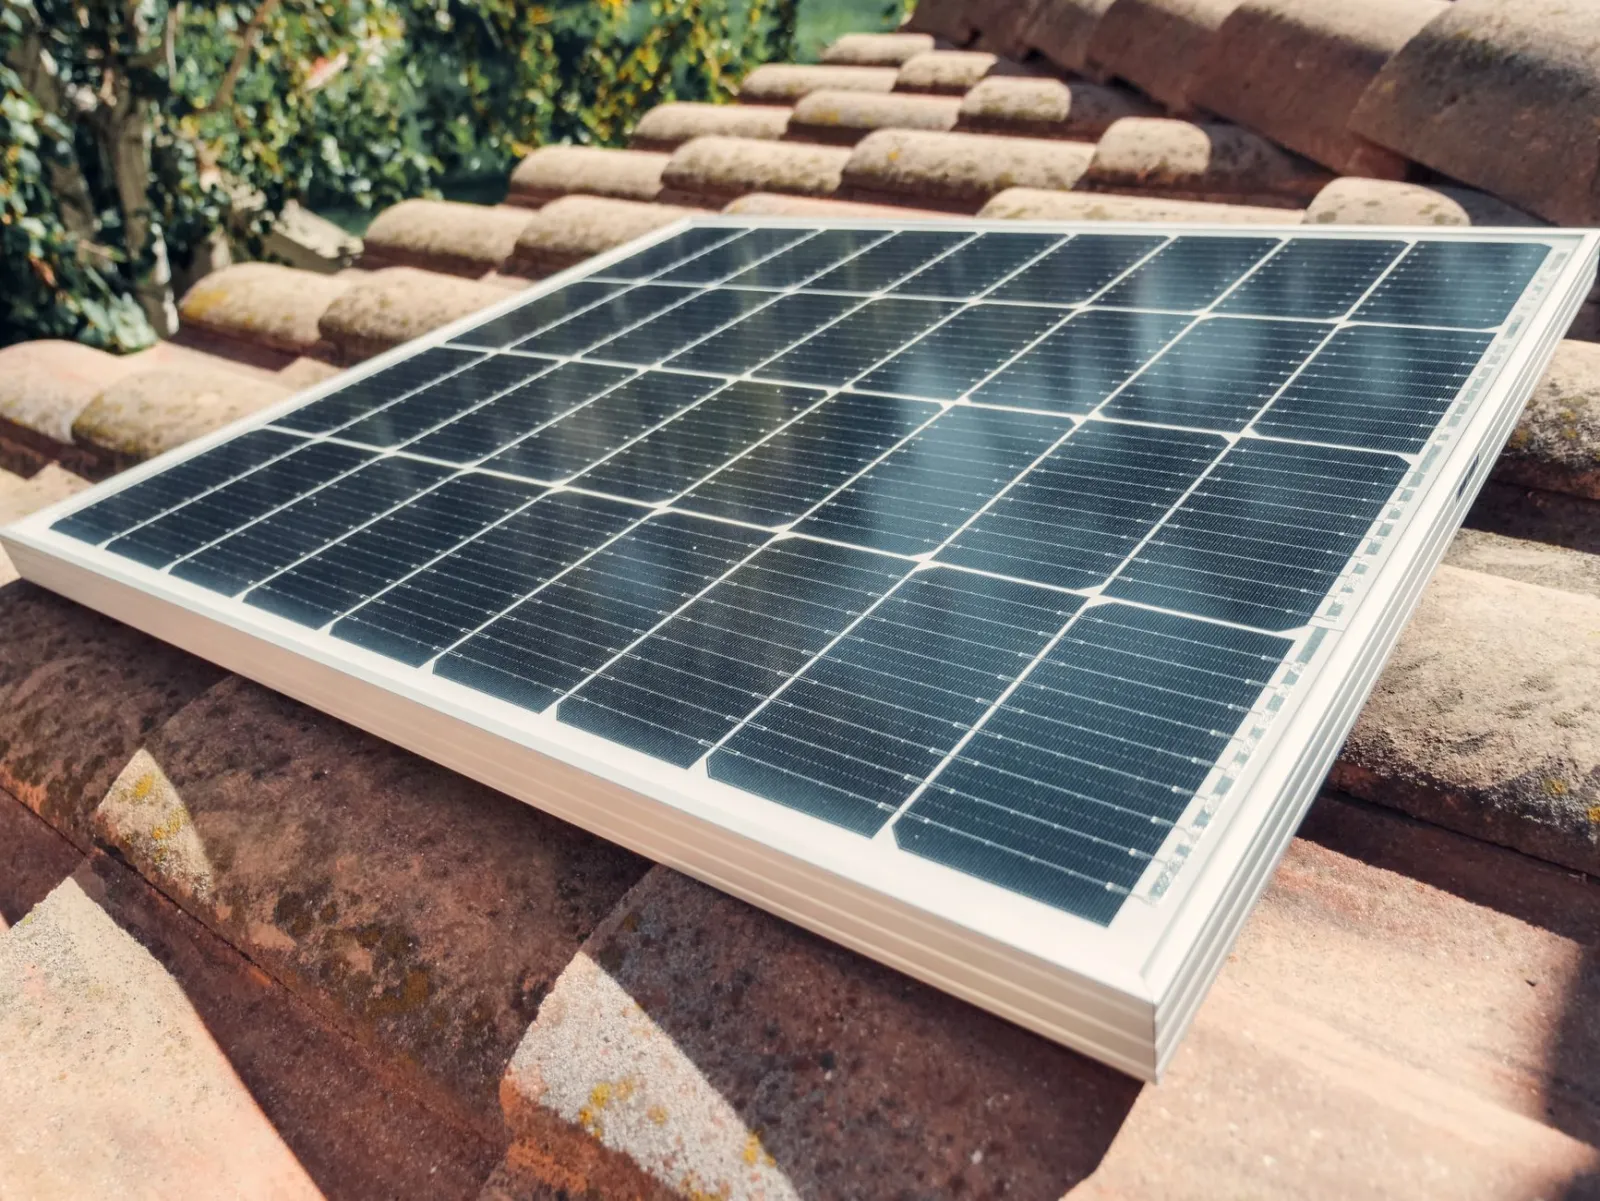
Solar power fits campervan life because it matches the way a campervan is actually used: intermittently, in places where hookups are inconvenient or unavailable, and with modest but steady electrical demands. A campervan has a small roof footprint and a light electrical load compared to a house, so a compact array of panels can meaningfully extend how long you can stay off-grid without running an engine or a generator. The core appeal is independence: you arrive at a spot, park, and let the sun top up the battery while you walk, cook, or sleep.
The practical case rests on load matching. Typical campervan consumption is dominated by a few devices: a compressor fridge running continuously, LED lighting, phone and laptop charging, a water pump, and occasionally a diesel heater fan or a fan for ventilation. These loads are small and spread across the day, which is exactly the profile solar handles well. Solar produces most of its output during daylight hours, and a battery bank buffers that energy for evening and overnight use. Because the daily energy budget is modest, a roof-mounted array sized to the available roof area can cover a large share of routine consumption in good weather, reducing reliance on driving to charge.
Solar also complements the way campervans move. Unlike a fixed installation, a campervan alternates between driving and parking. Driving can charge the leisure battery through a DC-to-DC charger or split charge relay, while solar covers the stationary periods. This combination means you are not dependent on a single charging source. On a trip where you drive a few hours and then park for several days, solar does the heavy lifting during the stationary stretch, and the alternator tops up during transit. The two sources cover each other’s weaknesses.
There are concrete use cases where solar changes the experience. Wild camping or parking in remote areas without electrical hookups becomes viable for longer stretches. Festival and event parking, where hookups are absent and generators are discouraged, becomes comfortable. Seasonal use in sunny regions rewards solar strongly, while winter or heavily shaded woodland sites reduce yield and make you lean more on driving and hookup charging. Solar is therefore not a universal solution but a strong fit for the common pattern of short drives, long stays, and modest loads.
Finally, solar suits campervan life because it is quiet, has no fuel logistics, and requires little attention once installed. There is no generator noise to disturb neighbours or yourself, no fuel to store and carry, and no exhaust. The main trade-offs are roof space, weight, and the reality that output varies with weather and season. Understanding those limits early keeps expectations realistic and helps you size the system around your actual habits rather than an optimistic best case.
Choosing the Right Panel Type for Your Van
When it comes to panel type, the choice for a campervan comes down to three families: rigid glass-and-aluminium panels, semi-flexible panels, and lightweight flexible panels. Rigid panels are the most durable and the most efficient for their footprint, because the glass front and framed backing keep the cells cool and protected. Their weight and thickness are the trade-off: they need solid mounting points and add meaningful load to the roof. Semi-flexible panels bend slightly and bond to a curved roof with adhesive, which suits vans with a gentle roof curve, but they still carry a backing sheet that traps some heat and needs a flat, clean surface to sit on. Fully flexible panels are the lightest option and conform to strongly curved surfaces, but they run hotter, tend to have shorter working lives, and are harder to repair if a cell or connection fails.
Efficiency per square metre matters most on a van, where roof space is the binding constraint. Rigid panels generally deliver the highest output for a given area, so if your roof is small and your power needs are high, a rigid panel earns its weight. Flexible panels make sense when weight or roof curvature is the deciding factor, and when you accept that you may replace them sooner. A practical middle path is a semi-flexible panel on a gently curved roof, combined with a rigid panel on any flat section, so you get durability where the surface allows it and conformability where it does not.
Cell technology is the second layer of the decision. Monocrystalline cells are the common choice for vans because they pack more power into a smaller panel, which is exactly what a limited roof rewards. Polycrystalline panels are usually a little larger for the same output but can be cheaper, so they suit a van with generous roof space and a tight budget. Thin-film panels are the lightest and handle heat and partial shading more gracefully, but they need noticeably more area to match the output of crystalline panels, which rarely works on a campervan roof.
Mounting and airflow should shape the choice as much as the cell type. A rigid panel raised on brackets lets air move underneath, which keeps the cells cooler and protects output on hot days. A bonded flexible panel sits flush and runs warmer, so it benefits from being mounted where it catches some breeze and is not sandwiched under a roof rack. Think about how you will clean the panel and reach the wiring, and whether you want the option to tilt it toward a low winter sun.
Finally, match the panel to how you actually travel. A weekend van that mostly runs lights, a fridge and device charging is well served by a single modest rigid panel. A full-time van with an inverter, a compressor fridge and regular laptop work needs more capacity, and that usually means rigid panels for the best output per square metre. If your roof is curved, weight-limited or already crowded with a rack and a vent, flexible or semi-flexible panels keep the installation feasible. Decide the roof constraint first, then let durability, efficiency and budget settle the type.
Matching Panel Wattage to Your Power Needs
Matching panel wattage to your actual power needs is the step most buyers rush, and it is the one that determines whether your setup keeps up on a cloudy week or leaves you rationing battery capacity. The practical approach is to work backwards from consumption rather than forwards from panel size. Start by listing what you will run and for how long: a compressor fridge cycling through the day, LED lighting in the evening, phone and laptop charging, a water pump, and perhaps a diesel heater fan in cold weather. Estimate each item’s daily draw in amp-hours or watt-hours, add them up, and you have the figure your panels must replace each day. Panels only produce their rated output under good sun and correct orientation, so real-world yield is consistently lower than the label suggests, especially in northern latitudes, in winter, or when parked in shade.
As a rough guide, a modest setup running a fridge, lights, and device charging sits in the low hundreds of watts of panel capacity, while a van with an inverter, a larger fridge, and regular laptop use pushes toward several hundred watts. The gap between these tiers is wide because small increases in consumption compound quickly once you add high-draw appliances. An inverter running mains equipment is the biggest single factor: a kettle or induction hob used briefly can demand more energy than everything else combined over a day. If your plans include that kind of load, panel wattage alone rarely covers it, and you should expect to rely on driving, shore power, or a battery-to-battery charger to fill the gap.
Battery capacity and panel wattage must be sized together. A large panel array feeding a small battery bank wastes potential on sunny days and leaves nothing in reserve overnight, while a big battery with undersized panels takes too long to recharge and may never reach full charge in poor weather. Aim for a balance where the panels can realistically refill the bank during a typical day of use, accounting for the fact that lead-acid batteries charge slowly in the final stage and lithium accepts charge more readily. The ratio matters more than either number in isolation.
Your travel pattern should shape the decision as much as your appliance list. A van that moves every day and covers decent distances can lean on alternator charging and get away with smaller panels, treating solar as a top-up. A van that sits still for days at a time, especially off-grid, needs panels sized to carry the full daily load independently. Seasonal use matters too: a setup that performs well in summer may fall short in winter, when shorter days and a lower sun angle cut yield substantially. If you camp year-round, size for the weaker season rather than the best one.
Finally, leave headroom. Panels degrade slightly over time, controllers have losses, and your needs tend to grow as you add devices. Choosing a wattage that comfortably exceeds your current calculated daily demand, rather than just meeting it, gives you margin for cloudy spells and future additions without forcing an immediate upgrade.
Flexible vs Rigid Panels: Key Trade-offs
The choice between flexible and rigid solar panels shapes how you mount the array, how much power you can realistically fit, and how long the system will last. Flexible panels are thin, lightweight, and bend to follow a gently curved roof, which makes them attractive on campervans with rounded or sloping surfaces where a flat rigid panel would sit awkwardly or leave gaps. Because they bond directly to the roof, they add almost no height, keep a low profile in the wind, and avoid the brackets and rails that rigid panels require. That low mounting height is a real advantage on pop-top roofs and on vans where every centimetre of clearance matters.
Rigid panels, by contrast, use an aluminium frame and a glass front, which makes them heavier and stiffer but also more durable and better at shedding heat. The frame lifts the panel off the roof, allowing air to circulate underneath; this airflow keeps cell temperatures lower, and cooler cells generally convert sunlight more efficiently than hot ones. On a flexible panel bonded flat to the roof, heat has nowhere to escape, so output tends to drop on hot, still days. For anyone planning long-term or full-time travel, the thermal behaviour and the mechanical robustness of a framed panel are usually worth the extra weight and height.
Durability is the other major trade-off. Rigid glass panels resist hail, branches, and the general knocks of travel, and their construction tends to hold up over many years. Flexible panels are more vulnerable: repeated flexing, foot traffic, and trapped moisture under the panel can degrade the cells and the backing over time, and a bonded panel is harder to inspect and replace. If you park under trees, drive rough tracks, or expect the installation to last a decade, a rigid panel is the more forgiving choice.
Weight and roof loading tie into this. A rigid panel plus its mounting hardware adds meaningful mass high on the vehicle, which affects handling and roof load limits, while flexible panels keep the centre of gravity low and the payload free for other gear. On a small van with a strict weight budget, or a roof that cannot safely carry a framed panel and rack, flexible may be the only practical option.
A sensible approach is often a hybrid: rigid panels on flat, load-bearing sections of roof and flexible panels on curved or space-limited areas, matched to the same charge controller. Decide based on your roof shape, how you park, your weight allowance, and whether you prioritise maximum output and longevity or a discreet, lightweight fit.
Essential Mounting and Roof Fixing Options
Mounting is where many campervan solar installations succeed or fail, because the panel itself is rarely the weak point. The roof of a van flexes, vibrates, and expands and contracts with temperature, so the fixing method has to tolerate movement without loosening or cracking the panel frame. The two broad approaches are bonding the panel directly to the roof with an adhesive, and bolting it to a raised rail or bracket system. Direct bonding is low-profile, cheap in hardware, and avoids drilling, but it makes the panel very hard to remove and traps heat underneath. Raised rails cost more and require penetrations, yet they allow airflow, easier replacement, and space to route cables.
Direct adhesive mounting suits flat, gently curved roofs and panels that sit close to the surface. The critical detail is surface preparation: the roof must be clean, abraded, and primed according to the adhesive manufacturer’s instructions, and the adhesive must be applied in continuous beads rather than spots so water cannot pool. A common failure is bonding to a painted surface that later lifts, taking the panel with it. Airflow matters here too, since a panel with no gap beneath it runs hotter, and heat reduces output. On a dark van roof in strong sun, that penalty is noticeable enough to justify small spacers or a shallow frame.
Raised rail systems use aluminium or stainless brackets fixed through the roof, usually with well-sealed bolts and a backing plate or spreader inside to spread load across the thin roof skin. Every penetration is a potential leak, so sealant quality and correct tightening matter more than the bracket brand. Rails also let you tilt or angle panels slightly, which helps with water runoff and self-cleaning. This is the better choice for larger panels, for roofs that already carry a rack, or where you expect to upgrade or remove panels later.
Roof type drives the decision. A pop-top or rising roof usually cannot take heavy panels without reinforcement and may need a flexible panel bonded directly. A high-top fibreglass roof accepts bonded panels well but needs care with sealant compatibility. Ribbed steel roofs need brackets that bridge the ribs so the panel is not stressed across corrugations. On any roof, keep panels clear of roof vents, skylights, and aerials, and check that the mounted height does not foul low barriers or car park height restrictions.
Cable entry deserves equal attention. A dedicated waterproof gland or roof box, positioned so water runs away from it, protects the wiring and lets you service connections. Leave a drip loop before the entry point and secure cables so they cannot chafe against the roof edge. Whichever method you choose, plan the mounting before buying the panel: the fixing system, roof structure, and cable route together determine whether the installation stays reliable through years of vibration and weather.
Charge Controllers: PWM or MPPT Explained
The charge controller is the component that sits between your solar panels and your leisure battery, and its job is to regulate the voltage and current coming in so the battery charges safely rather than being damaged by an uncontrolled feed. Two technologies dominate the campervan market: PWM (pulse width modulation) and MPPT (maximum power point tracking). The choice matters because it affects how much of your panels’ output actually reaches the battery, and therefore how quickly you recharge when parked up.
A PWM controller works by rapidly switching the panel connection on and off, effectively pulling the panel voltage down toward the battery voltage. This is cheap and reliable, but it wastes the difference between the panel’s operating voltage and the battery’s charge voltage. The practical consequence is that a PWM controller only really makes sense when your panel’s nominal voltage closely matches your battery bank, such as a nominal twelve-volt panel charging a twelve-volt battery. If you pair a higher-voltage panel with a PWM controller, a meaningful share of the harvested power is simply lost as heat rather than stored.
An MPPT controller actively tracks the panel’s maximum power point, converting the excess voltage into additional charging current. This is most valuable when there is a significant voltage gap between panel and battery, for example a panel with a higher nominal voltage feeding a twelve-volt system, or when panels are wired in series to reduce cable losses over a long run. In cold, bright conditions panel voltage rises and MPPT can extract more, while in hot conditions or partial shade the advantage narrows. MPPT units cost more and are physically larger, but for most campervan builds with a reasonable panel array they recover that cost through faster charging.
For a small, simple setup, a single low-voltage panel and a modest battery, PWM is a defensible budget choice and keeps the wiring straightforward. For anything larger, multiple panels, series wiring, or a lithium battery that benefits from a controlled multi-stage charge profile, MPPT is the better fit and gives you more usable energy from the same panels. Whichever you choose, size the controller’s current rating above your array’s maximum output with some headroom, and confirm it supports the charge profile your battery chemistry requires.
Cable Sizing, Fuses and Safe Wiring Basics
Cable sizing is where many campervan solar builds quietly fail. A panel can be perfectly rated and a controller well chosen, yet undersized cable will waste power as heat, cause a noticeable voltage drop between panel and controller, and in the worst case overheat. The governing principle is simple: current rises in thin cable, and voltage drop grows with both cable length and current. Because a solar array on a van roof often sits several metres of cable-run away from the controller, the round-trip length matters, not just the straight-line distance. As a rule of thumb, keep voltage drop low enough that the controller still sees a healthy input voltage; on a 12 V system even a modest drop represents a meaningful fraction of the available power, so err toward thicker cable rather than thinner.
Voltage drop is the practical criterion most builders underestimate. A long run of thin cable on a low-voltage array loses a surprising share of the panel’s output before it ever reaches the controller. The fix is either thicker conductors or, where the controller supports it, wiring panels in series to raise the array voltage so the same power travels at lower current. Series wiring reduces current and therefore drop, but it also raises the open-circuit voltage, which must stay within the controller’s input limit on the coldest mornings, when panel voltage climbs. Parallel wiring keeps voltage low and current high, demanding thicker cable but simplifying controller compatibility. Choose the topology first, then size the cable to the resulting current and run length.
Fuses and breakers protect the cable, not the appliance. Every conductor carrying battery current should be fused close to the battery positive terminal, so that a short anywhere along the run is cleared before the cable overheats. The fuse rating should sit above the expected continuous current but below the cable’s current-carrying capacity, so the fuse blows before the wire is damaged. On the panel side, a fuse or breaker between array and controller is good practice, and a means of isolation at the controller makes maintenance and fault-finding far safer. Do not rely on the controller’s internal protection alone; it does not protect the cable between battery and controller.
Terminations and routing deserve as much attention as gauge. Loose or corroded connections add resistance and heat, so use proper crimped terminals, keep joints to a minimum, and protect exposed connections from damp and vibration. Route cable away from sharp edges and hot surfaces, secure it at regular intervals so it cannot chafe, and use glands where it passes through the roof or bulkhead to keep water out. A drip loop before any entry point stops water tracking along the cable into the van. Where cable runs through living space, mechanical protection such as conduit guards against accidental damage.
Finally, size for the real load, not the optimistic one. Account for the controller’s maximum output current, the round-trip cable length, and a margin for future expansion. If you plan to add a second panel or a larger controller later, choosing one gauge thicker now avoids re-running cable through finished walls. Match fuse ratings to the cable you actually installed, label circuits clearly, and keep a simple wiring diagram on board. Safe wiring is unglamorous, but it is what lets the rest of the system deliver its rated performance year after year.
Battery Bank Compatibility and Storage Tips
Battery bank compatibility is where many campervan solar builds succeed or fail, because the panel and the battery must agree on voltage and charging behaviour. A solar panel’s nominal voltage rarely matches what a battery needs at its terminals, so a charge controller sits between them and converts the panel output to a suitable charging profile. Before buying panels, confirm your battery chemistry, because a lead-acid bank, an AGM bank, and a lithium bank each expect different absorption and float behaviour. A compatible charge controller with selectable profiles matters more than a marginally larger panel.
Sizing the bank against the panel is the next practical checkpoint. As a rough rule of thumb, a solar array that is very large relative to the battery capacity will push the bank into absorption quickly and then waste the rest of the day’s production, while an array that is too small will leave the bank chronically undercharged. A balanced setup generally pairs a panel array with a battery bank large enough to absorb a full day of good production without overheating or overvoltage. If you plan to add panels later, choose a controller with headroom in both current and voltage so the existing bank is not the limiting factor.
Storage tips depend on how the van is used. For a van that sits idle for weeks, a lead-acid bank self-discharges and sulfates if left partially charged, so it benefits from a maintenance charge or a small solar trickle keeping it topped up. Lithium banks hold charge far better and tolerate partial states of charge, but they dislike being stored at full charge in high heat for long periods. In both cases, disconnect loads you do not need and check that the controller’s float or storage mode is active rather than letting the bank drift.
Temperature is a silent factor in compatibility. Batteries installed in a cold locker or an unvented compartment under a bed can charge poorly in winter and age faster in summer, and some chemistries require the controller to reduce or suspend charging when the bank is very cold. Position the bank where it sees moderate temperatures and reasonable ventilation, and make sure the controller’s temperature compensation, where available, is set for the actual chemistry.
Finally, match the wiring and fusing to the bank, not just the panels. Undersized cable between the controller and the battery introduces voltage drop that makes the controller think the bank is fuller than it is, which shortens charging and can leave you short on capacity by evening. Use cable rated for the controller’s maximum current, keep runs short, and fuse at the battery end. A modest, well-matched system with correct wiring will usually outperform a larger array strung together with mismatched batteries and thin cable.
Installation Mistakes That Cost You Power
The most common installation mistake is shading that the owner never notices. A panel is only as productive as its least-lit cell, and even a small shadow—a roof vent, an aerial, a bike rack, the corner of a solar shower bag—can drag down output from the whole panel rather than just the shaded portion. On a campervan roof, space is tight and hardware crowds the panel, so it pays to walk around the vehicle at different times of day and check what falls across the glass. A shadow that moves across the panel through the morning is far less damaging than one that sits in the same spot all afternoon.
Cable sizing and routing quietly rob power too. Undersized cable between the panel and the controller introduces voltage drop that turns into heat instead of charge, and the longer the run, the worse it gets. Keep cable runs short, use cable rated for the current and length involved, and avoid coiling excess cable tightly or running it through hot, cramped spaces. Loose connections and corroded terminals are another silent loss: a connector that is not fully seated or has been exposed to road spray and salt will add resistance and can fail outright. Good crimps, proper connectors, and a little dielectric protection at the joints go a long way.
Mounting angle and ventilation are frequently overlooked. A flat-mounted panel on a van roof collects dirt and water and rarely sits at a favourable angle to the sun, so it underperforms a tilted panel of the same rating. Leaving an air gap beneath the panel helps it run cooler, since panels lose output as they heat up, and a hot panel pressed flat against a dark roof is a worst case. If you can tilt or at least elevate the panel, do so, and clean the glass regularly—dust, pollen, and bird droppings are surprisingly effective at cutting yield.
Controller placement and wiring order cause real problems. Mount the charge controller close to the battery to keep the battery-side cable short, and in a spot with some airflow, because controllers generate heat. Wire the battery to the controller before connecting the panel, so the controller can sense the battery and start up correctly; connecting the panel first can leave some controllers confused or unprotected. Match the controller to the panel’s voltage and current rather than guessing, and make sure the panel’s open-circuit voltage stays within the controller’s limit on cold mornings, when voltage rises.
Finally, expect losses from the system as a whole and design around them. Every connection, length of cable, shade patch, and degree of heat takes a bite out of the panel’s rated output, so a system that looks adequate on paper can fall short in real use. Plan for headroom, keep the installation tidy and accessible for inspection, and recheck connections and mounting after rough roads, since vibration loosens what a driveway install left tight.
Budgeting for a Full Campervan Solar Setup
Budgeting for a full campervan solar setup is less about a single purchase and more about assembling a chain of components that must work together. The panel is only one line item. A realistic budget has to account for the charge controller, the battery bank, wiring and fuses, mounting hardware, and the small accessories that make the system usable. Campers who price only the panel and then discover the rest of the list are the ones most likely to cut corners on safety-critical parts like fusing and cable gauge.
The battery is usually the largest and most consequential cost, and it deserves the most thought. Battery chemistry drives both the price and the rest of the design: a lithium-based bank costs more upfront but tolerates deeper discharge and charges faster, while a lead-acid bank is cheaper to buy but heavier and shorter-lived if deeply cycled. Sizing the bank to your real daily consumption, rather than to the panel’s output, prevents the common mistake of buying panels that can never fully recharge an oversized battery. A modest setup for weekend trips and a full-time off-grid build sit at very different points on the budget scale, and the gap between them is mostly battery capacity and controller quality.
The charge controller is where budget setups most often go wrong. A controller rated below the panel’s output wastes capacity or fails, and a cheap unit may not support the charging profile your battery needs. An MPPT controller generally costs more than a PWM unit but extracts more usable power from the same panel, which matters most in low-light conditions and on cloudy days. Treat the controller as a matched component, not an afterthought, and budget for one rated comfortably above your panel’s maximum output.
Wiring, fuses, breakers, and mounting hardware are inexpensive individually but add up, and they are not optional. Undersized cable causes voltage drop and heat; missing fusing creates a genuine fire risk. Roof mounts, brackets, and cable entry glands also belong in the budget, along with a battery monitor if you want to know what your system is actually doing. These items are easy to overlook because they are invisible once installed, but skipping them undermines everything above them.
A practical approach is to budget in tiers: a minimal weekend kit built around a single panel and a modest battery, a mid-range setup sized for regular off-grid use with an MPPT controller and a larger bank, and a full-time build with redundant capacity and proper monitoring. Decide which tier matches your travel pattern before buying anything, then allocate the largest share to the battery and controller, where quality has the most effect on reliability. Leaving a margin for the accessories and unforeseen extras is wiser than spending the entire budget on the panel itself.
Frequently asked questions
How many solar panels does a campervan need?
The number depends on your daily power consumption, not on the van size. Add up the watt-hours used by your fridge, lights, charging and devices, then size the array to replace that energy on a typical day of decent sunlight. Most campervans use one or two panels, but the correct count comes from your own energy audit. Oversizing wastes roof space and money; undersizing leaves you relying on hook-up or driving to recharge.
Can flexible solar panels be mounted on curved roofs?
Yes, flexible panels are designed for gently curved surfaces and can be bonded directly to a campervan roof with adhesive, avoiding drilled holes. They suit low-profile and pop-top roofs where rigid panels would not sit flat. However, they need a smooth, clean surface and adequate ventilation underneath, because heat buildup reduces output. Avoid mounting them over sharp curves or ribs, and check that the bend radius stays within the panel manufacturer’s stated limits.
Do I need an MPPT charge controller?
An MPPT controller is generally the better choice for campervan solar because it tracks the panel’s maximum power point and converts excess voltage into usable charging current, which helps in low light and when panel voltage is well above battery voltage. PWM controllers are cheaper but simpler and waste more energy. For anything beyond a small trickle panel, MPPT usually recovers more of your array’s output. Match the controller’s current rating to your panel wattage and battery voltage.
How much does a campervan solar setup cost?
Cost varies widely with array size, panel type, controller quality, cabling and whether you pay for installation. A small trickle-charge kit costs far less than a full roof array with an MPPT controller and professional wiring. Flexible panels usually cost more per watt than rigid ones. Rather than chasing a single figure, budget by listing each component, then compare quotes. Remember mounting hardware, fuses, and a battery monitor, which are easy to overlook.
Can I install campervan solar panels myself?
Many owners install their own panels, especially bonded flexible panels or rigid panels on roof rails. The work involves planning cable routes, sealing any roof penetrations, fitting fuses close to the battery, and connecting the controller correctly. The main risks are water ingress, undersized wiring, and reversed polarity. If you are not confident with 12V wiring, roof sealing, or battery safety, have a qualified auto-electrician handle the installation. Always disconnect the battery before working.
How do I maintain solar panels on a campervan?
Keep the panel surface clean, since dust, bird droppings, tree sap and road film block light and cut output. Rinse with water and a soft cloth; avoid abrasive cleaners and harsh chemicals. Periodically check mounting brackets, adhesive edges and cable glands for looseness, cracking or water ingress. Inspect wiring and connectors for corrosion, and confirm the controller is still charging correctly. Under shade or snow, clear the panel before expecting any meaningful charge.
Will solar panels charge my leisure battery while driving?
Only indirectly. Solar panels charge whenever they receive light, including while you drive, but the alternator is usually the main charging source on the move. Many setups use a split-charge relay or DC-DC charger to charge the leisure battery from the vehicle alternator, while solar tops it up. Combining both gives faster recovery and covers parked days. Ensure your controller and any DC-DC unit are compatible so they do not fight each other or overcharge the battery.
What size cable should campervan solar wiring use?
Cable size depends on current, run length and acceptable voltage drop, so calculate rather than guess. Longer runs and higher currents need thicker cable to avoid energy loss and overheating. Keep the controller close to the battery to shorten the high-current section, and always fit a fuse rated for the cable near the battery. Use flexible, stranded cable suited to vehicle vibration, and check the controller and panel manuals for their recommended minimum conductor size.
Put it into practice : How much does it cost to install a solar panel?
Work out your own case in 30 seconds:
Methodology
This calculator produces an indicative estimate based on the parameters you enter. The ranges used reflect typical market tiers in the eco and energy savings space and are neither a commercial offer nor a guarantee. Prices and availability may vary.
Full guide :Sustainable Home
More from this guide :
Was this guide helpful?
Share your experience with the WiseHomeGuides community.